.png)
Preparing New Agent Package: Docusign Process for EVP/MPM
This is the step by step process on how to use a docusign template for hiring agents to Redwood.
As the EVP or MPM, you will have access to the Docusign Templates for hiring a new agent to Redwood. See the step by step instructions below.
Here is a video tutorial as well: How to Prepare and Send New Agent Package Through Docusign
IMPORTANT NOTE: You will still need to submit the executed new hire package to Corporate to onboard the agent. You will still need to download the PDF file then submit to newagentsubmission.c21redwood.com.
Step 1: Log in to Docusign
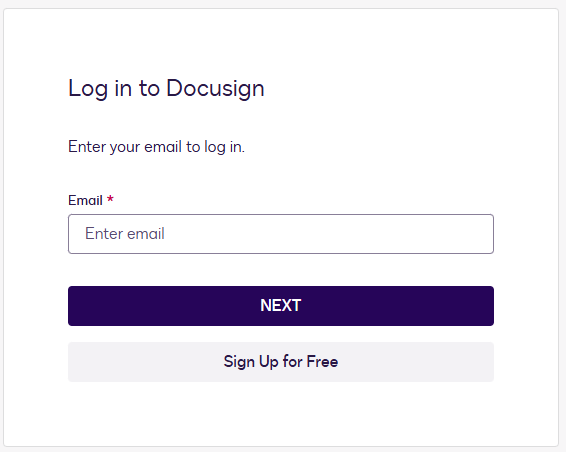
Resources:
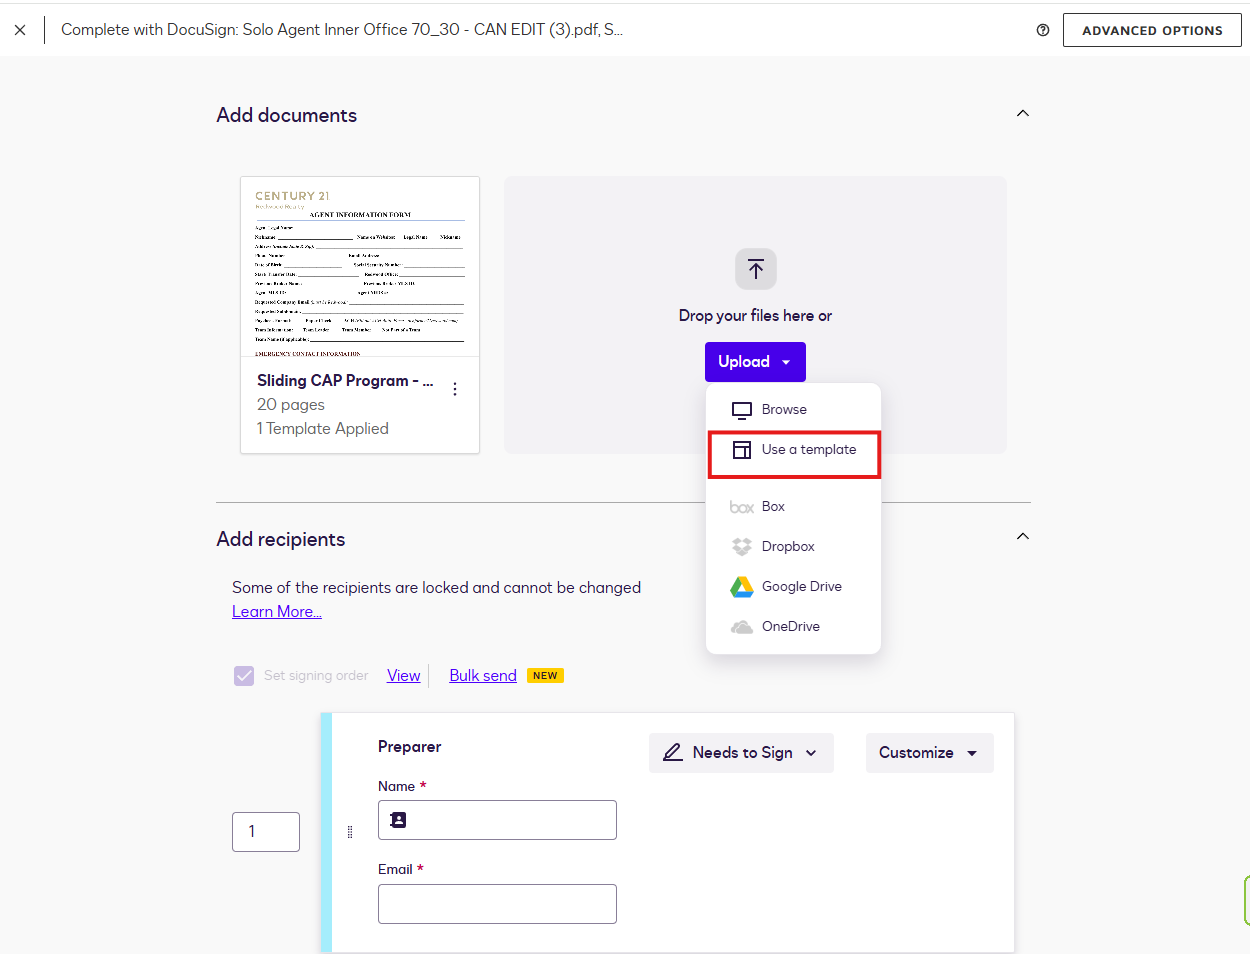
Step 2: Find the Shared Folder
Go to the “Home” menu
Click “New” (dropdown)
Select “Use a Template”
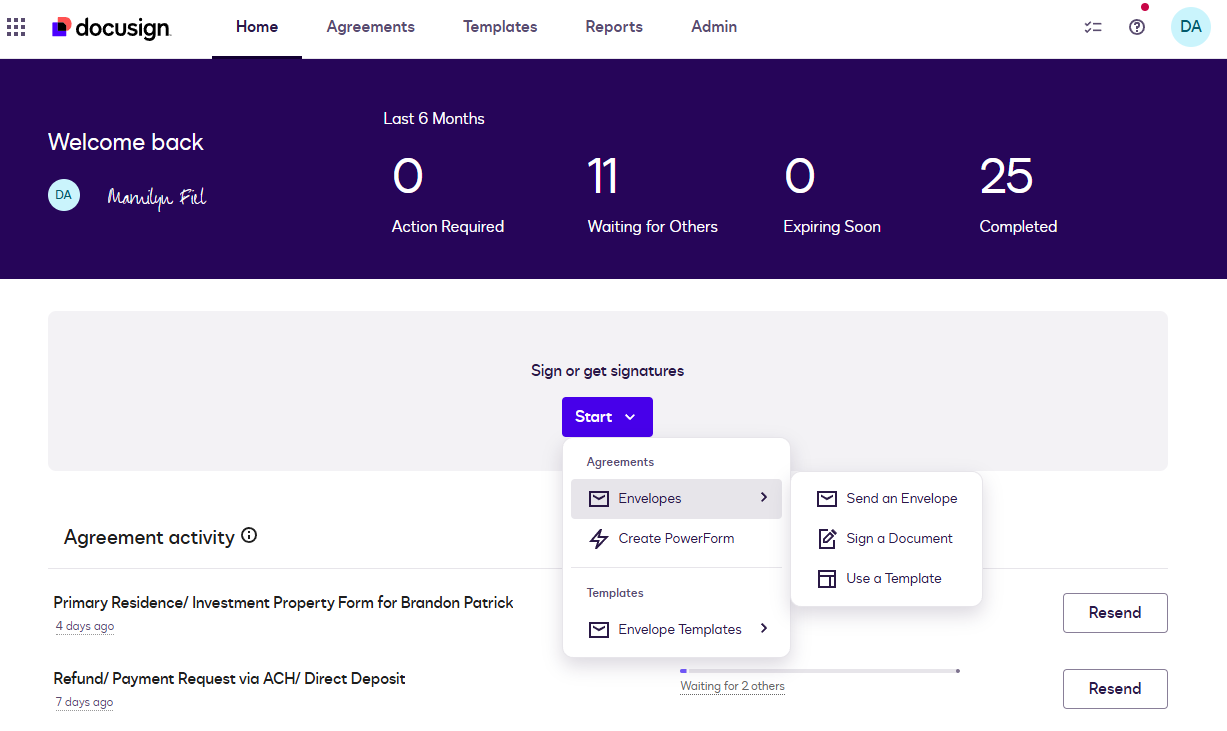
Then find the templates under the “Shared Folder”
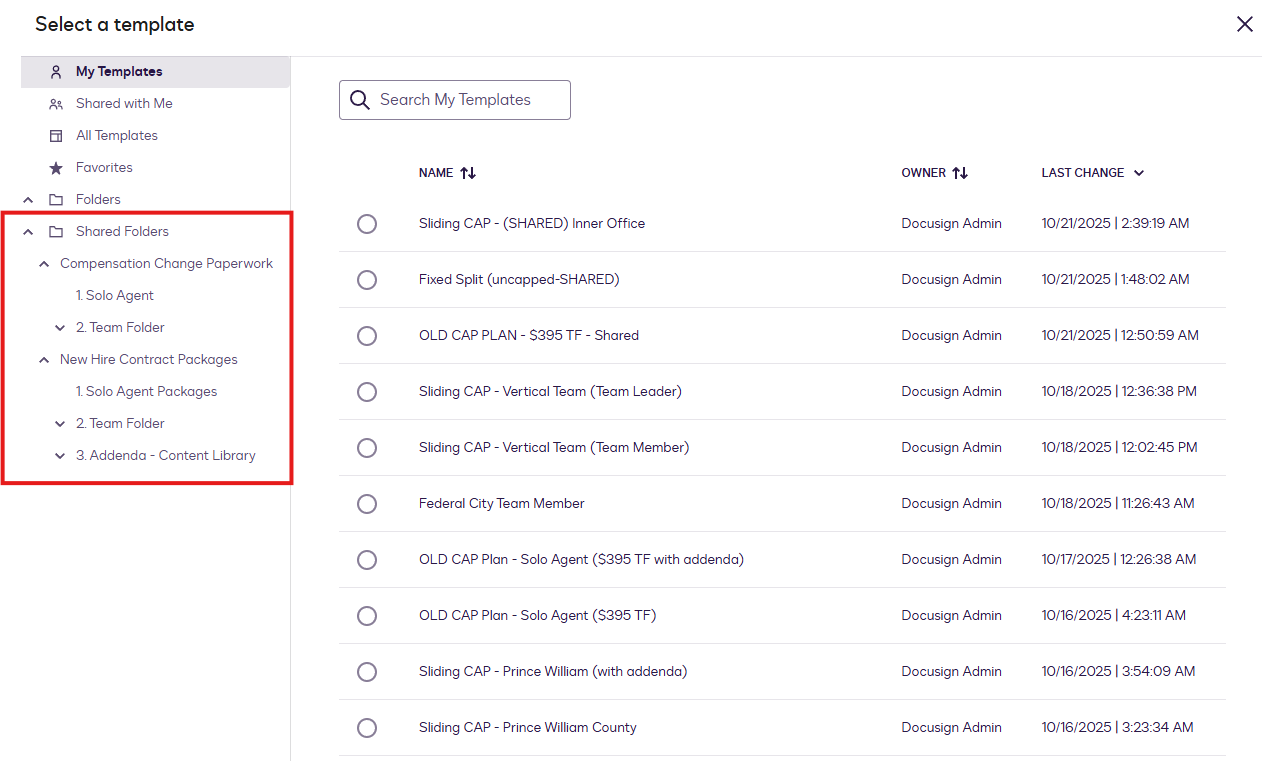
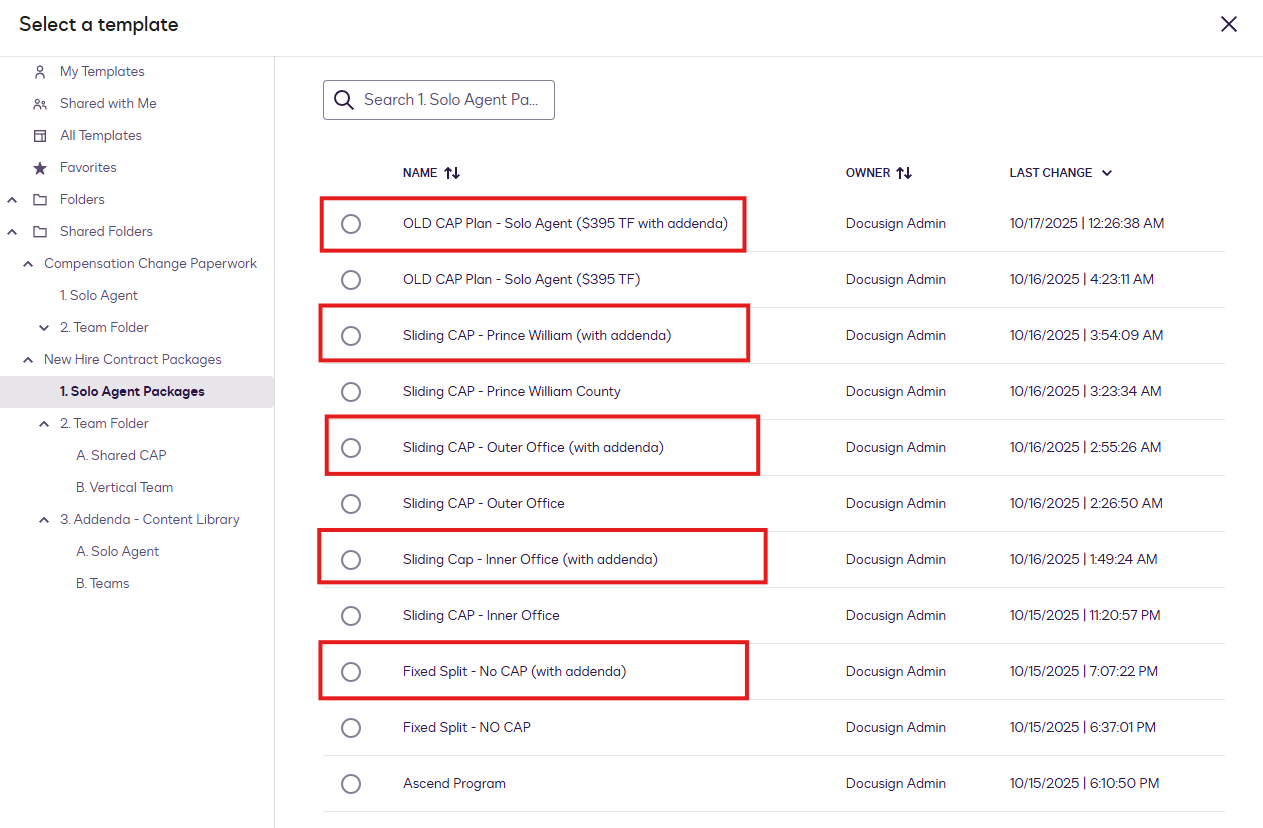
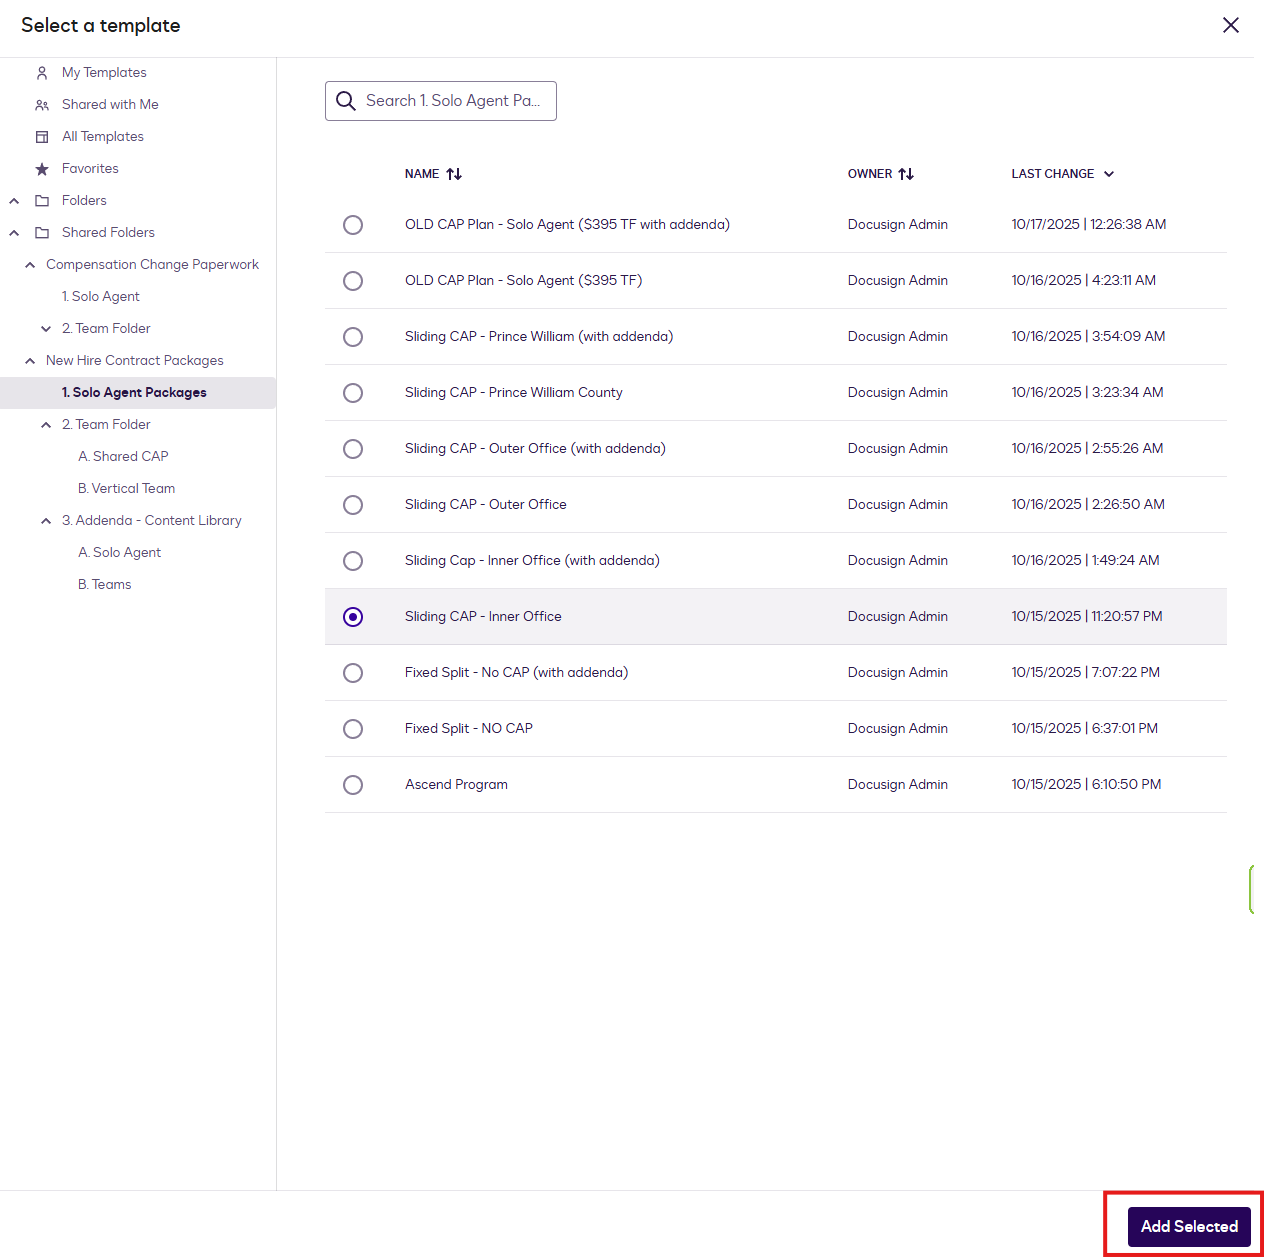
Step 3: Choose the Template
Select the applicable template from the Shared Folders. Here are the different folder categories:
- Solo Agent Packages: use this template for solo agents new to Redwood (not part of a Team). The different Commission Plan options are Ascend, Sliding CAP with 70/30 split, and Fixed Split (no CAP).
- Team Folder: select the templates from the subfolders (Vertical Team or Shared CAP) for agents part of a team. There is also a template for the Fed City team under the Vertical Team subfolder.
- Addenda – Content Library: these are additional pages that can be added to the templates. The library is divided into 2 subfolders – Solo Agent or Teams.
- There are available packages that already has all of the addenda in it.
Click the “Add Selected” button
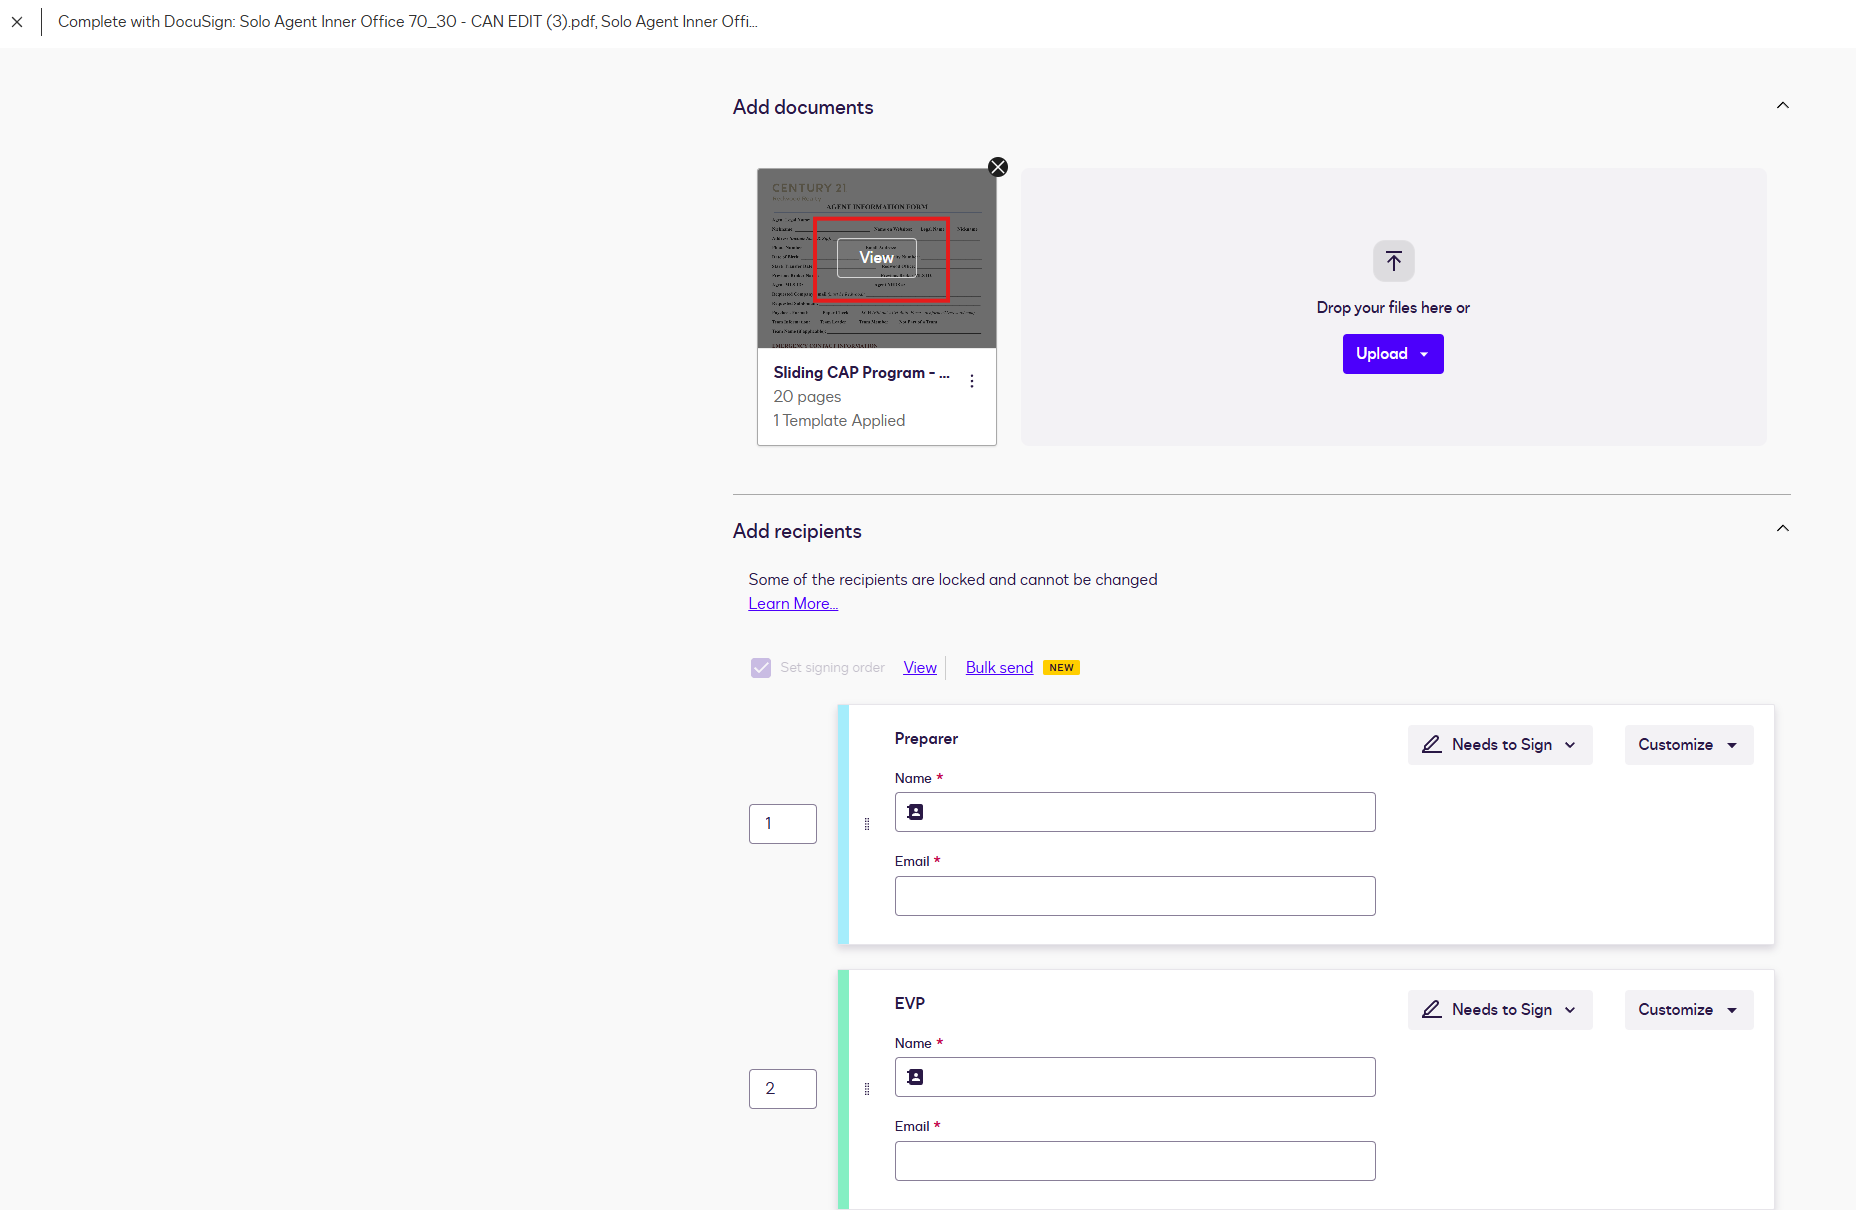
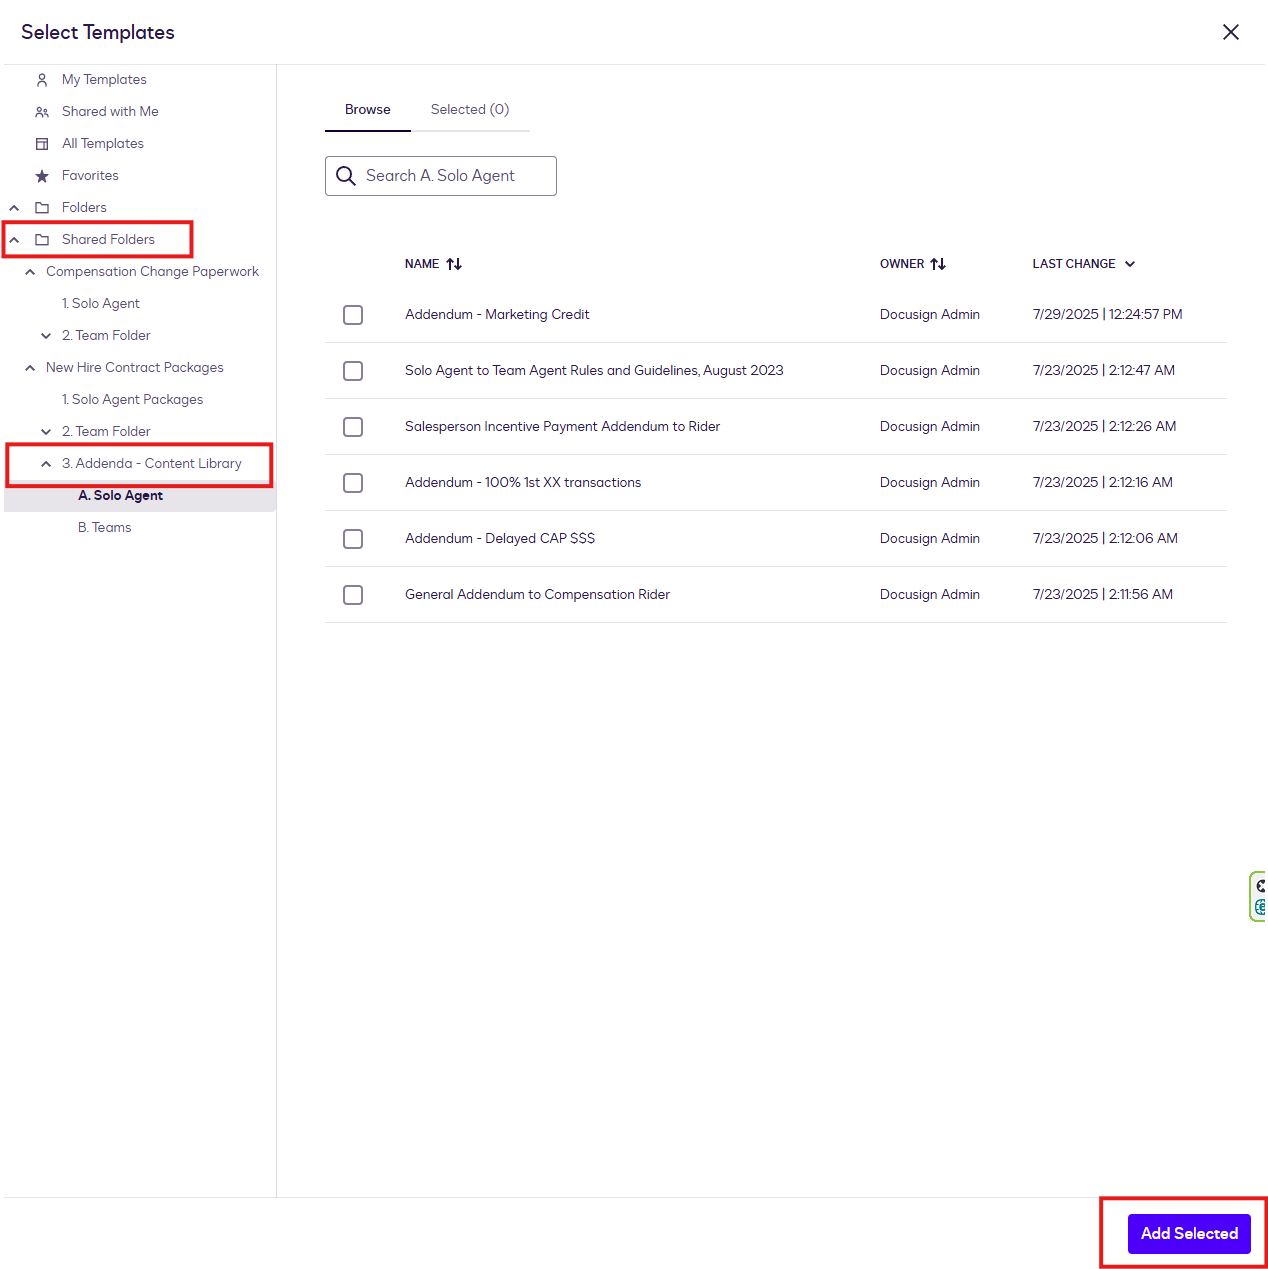
Step 4: Add the Addendum from Content Library
When a separate addendum is needed to be added to the package, add the document first before entering the recipients.
Click on “Advanced Edit” button
Click “Upload” then Select “Use a Template”
Look for the “Shared Folders”
Click on “Addenda-Content Library” folder
Select the applicable addenda then Click the “Add Selected” button
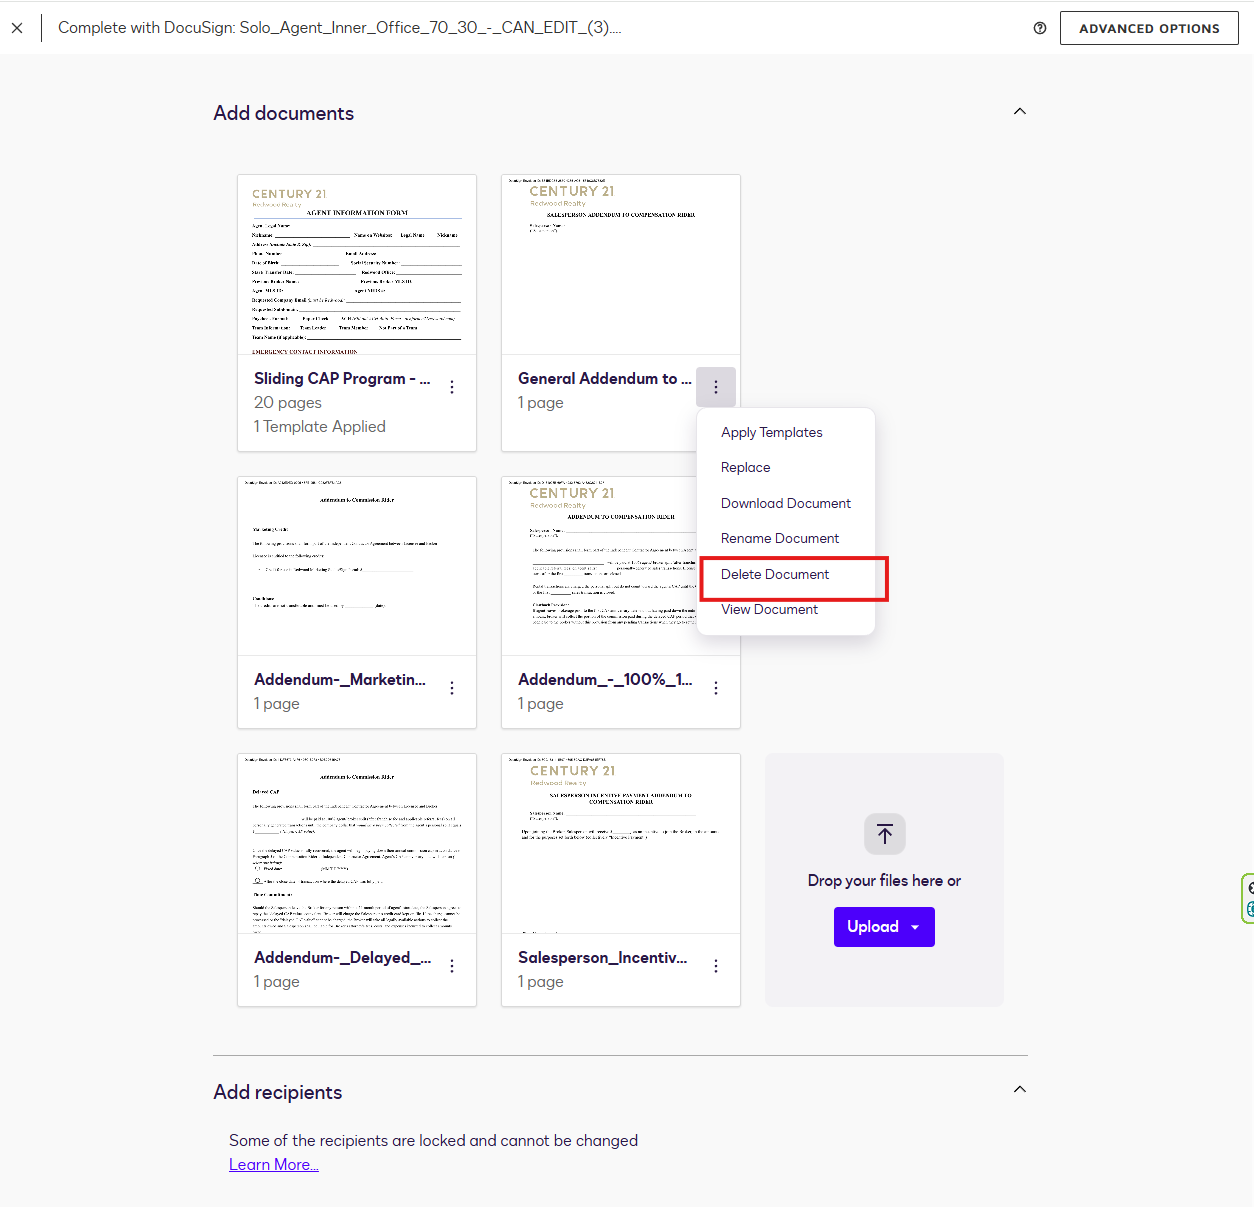
If you initially selected a New Hire Package that has all the addenda added in it, you may delete any document that will not be applicable to the agent.
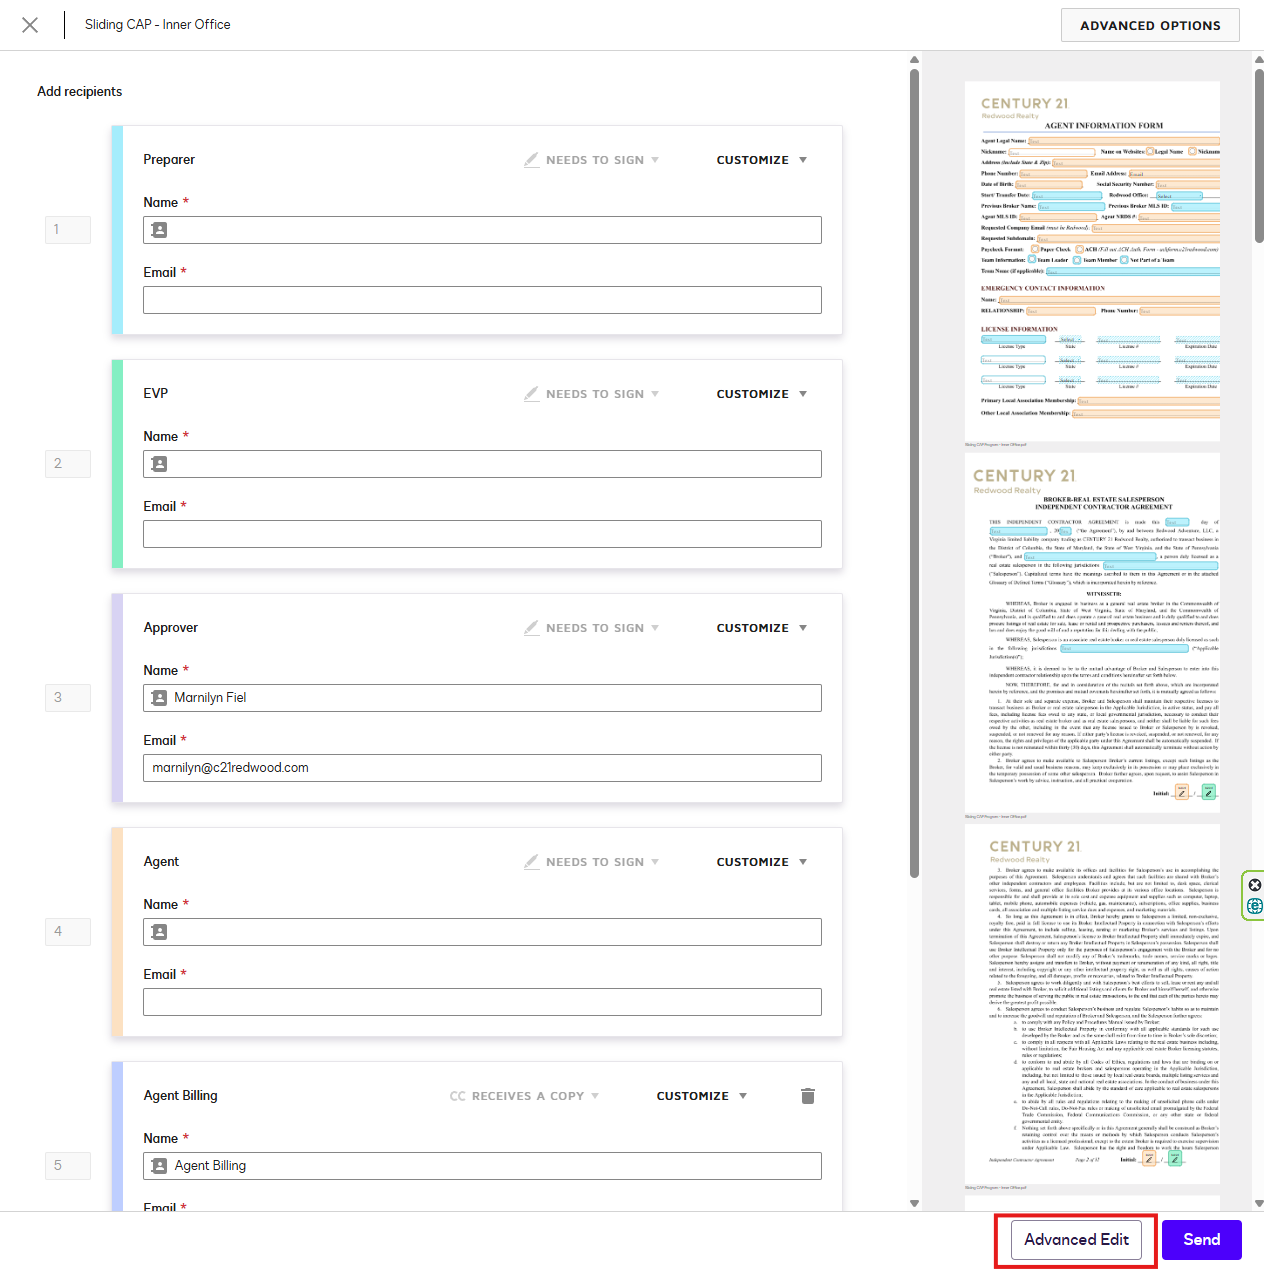
Step 5: Edit the recipients
Fill in the recipients.
- For MPM – You will add your information as the Preparer then fill in the EVP and Agent Name
- For EVPs – You will add your information on both the Preparer and EVP roles.
The signing order is as follows: Preparer > EVP > Marnilyn/ Approver > Agent
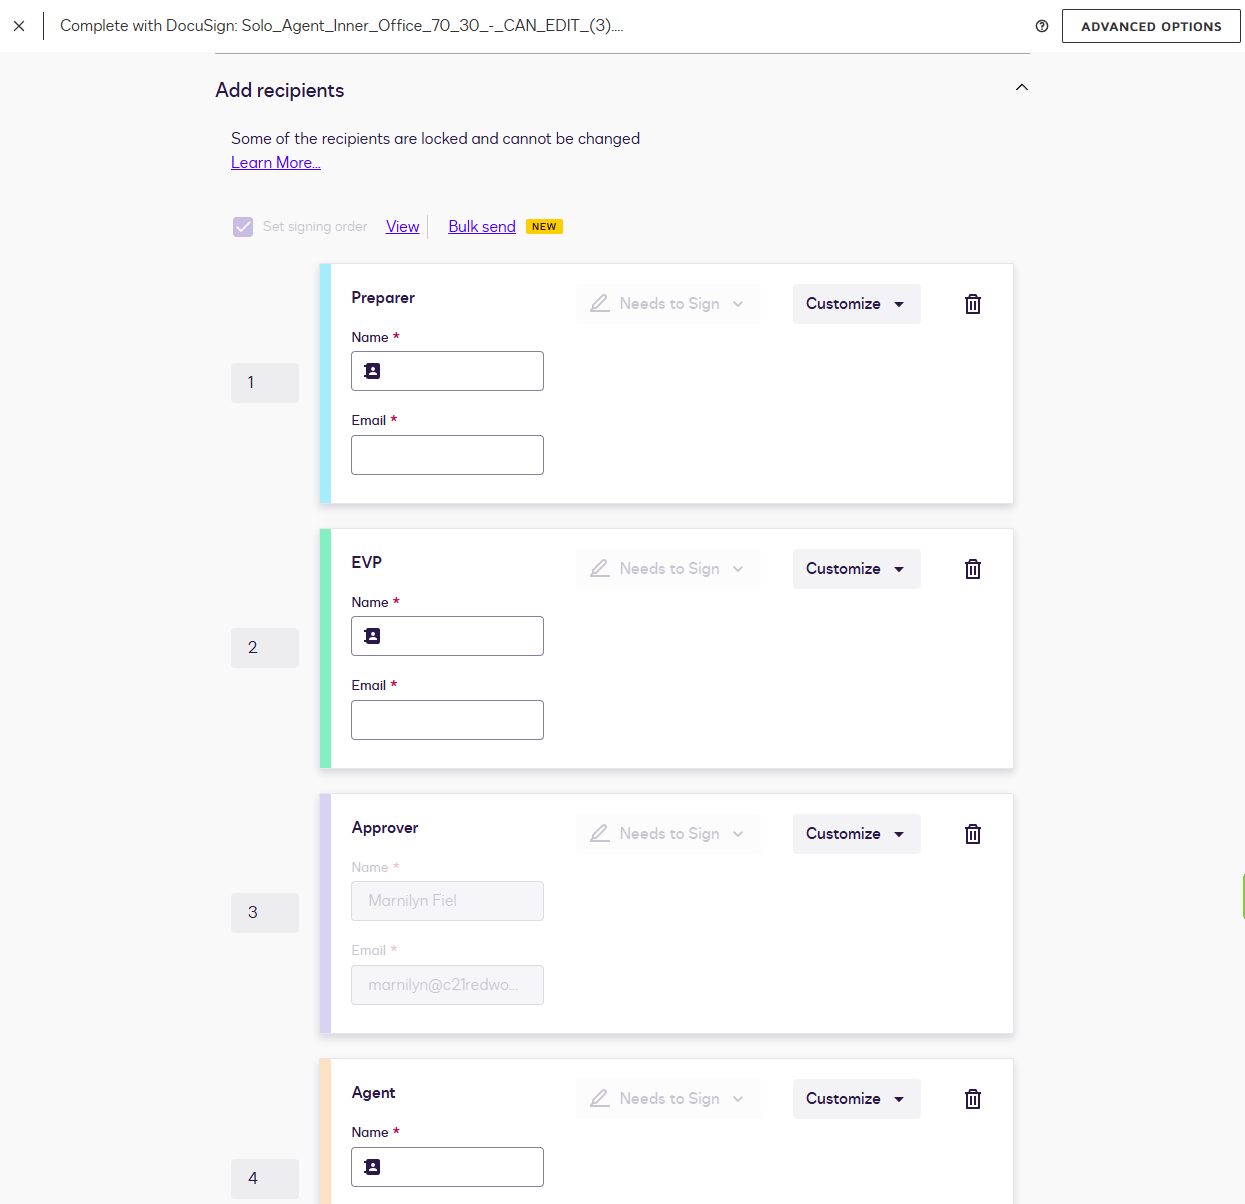
NOTE: If Marnilyn is out, you can change the Approver information to one of the Owners who is available to sign.

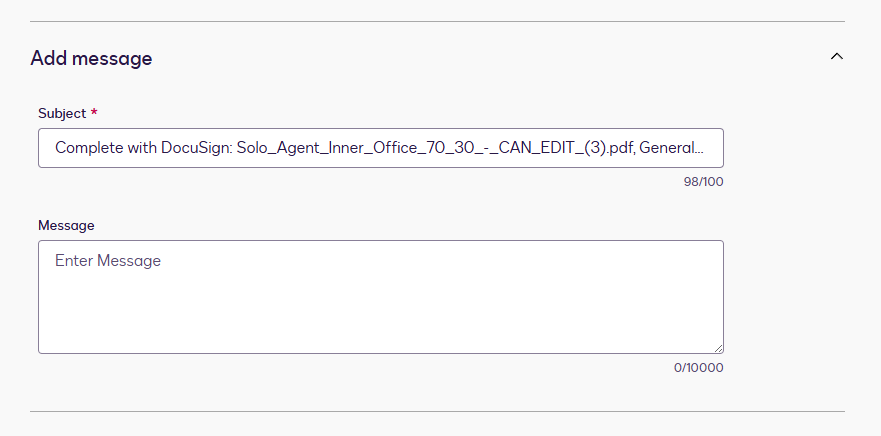
Change the Subject and Customize your message! Please note that this message will show on every recipient including the Agent.
Click the “Advanced Edit” on the bottom right side of the screen (DO NOT HIT SEND YET!)
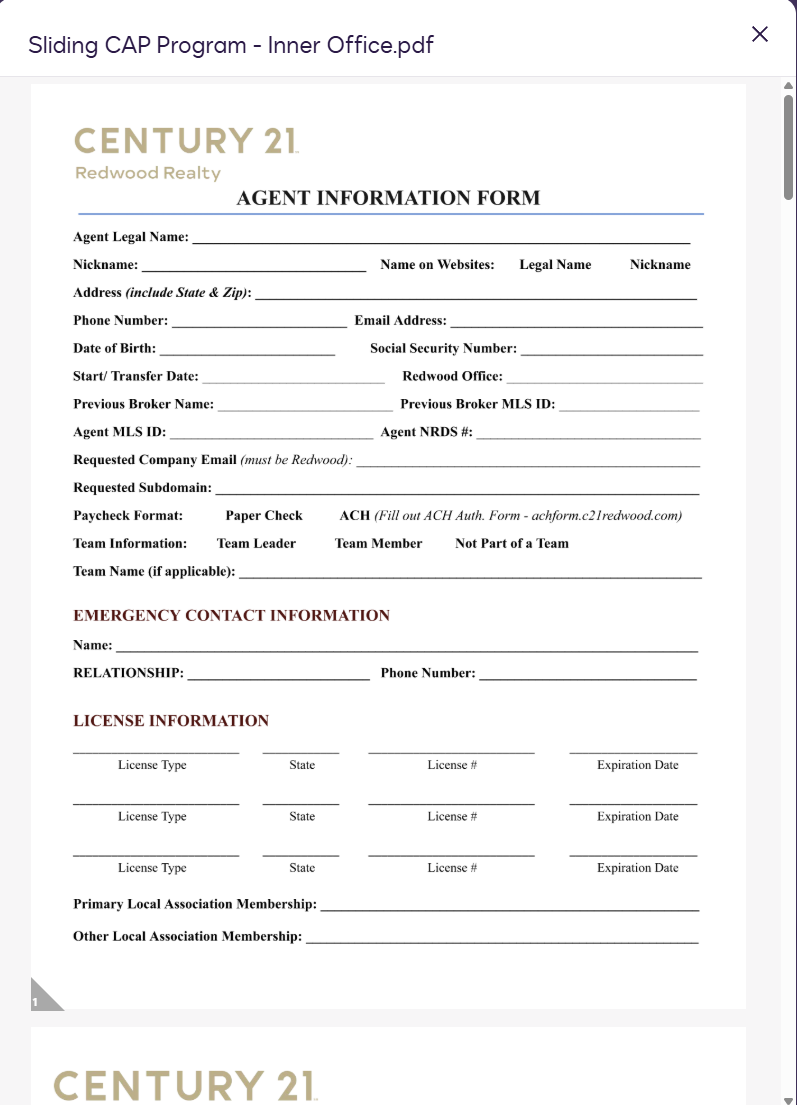
Step 6: Fill in the necessary information on the document
Click “View” to see the documents included on the package.