.png)
How do I set up my signature in Gmail in Google Workspace?
This guide explains how to customize your signature in Gmail.
Note: If you are an employee of Redwood, your signature is created for you and you cannot edit it. If there is something wrong with your signature, please contact Support.
If you are an Agent at Redwood, follow the steps below to create and apply your email signature.
Begin by logging into Gmail: in your web browser, go to mail.google.com and log into Redwood’s Google Workspace.
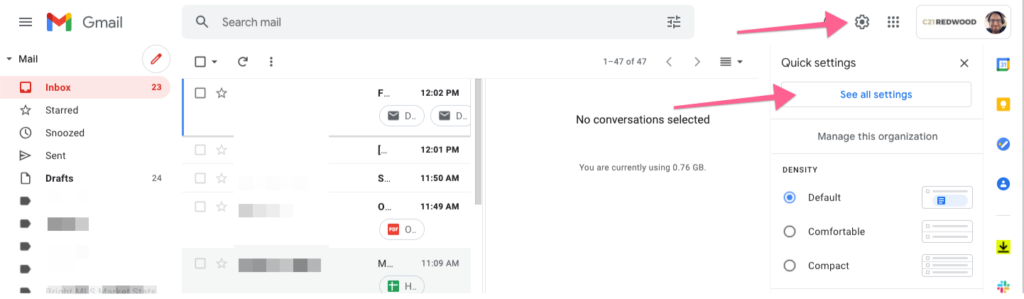
Next, click on the Settings gear in the upper-right-hand corner and then click on See all settings:
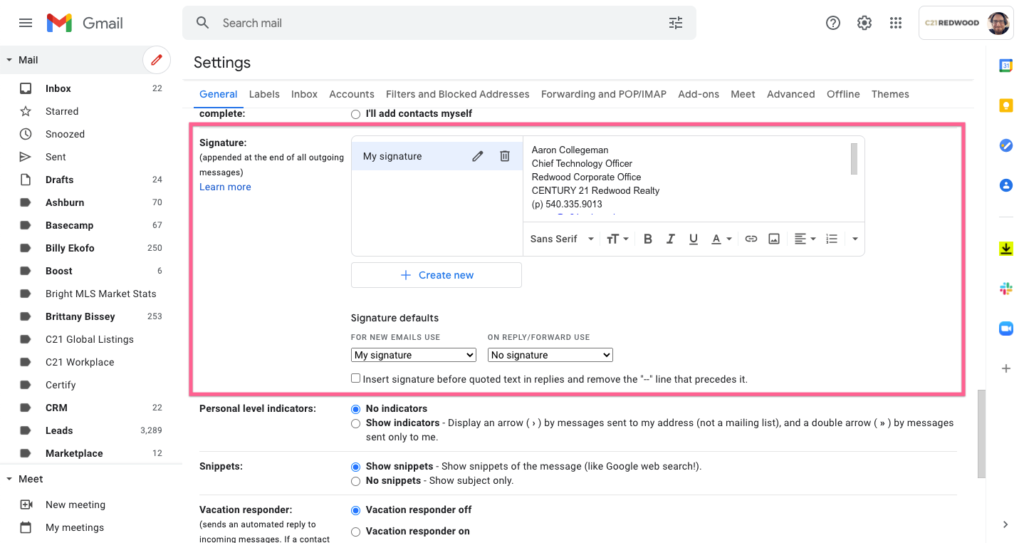
Scroll the Settings screen until you get to the Signatures section:
Now, technically, you can have as many signatures as you want. We recommend that you have no more than two, and, in fact, you can get away with just one. This is explained below.
Gmail allows you to have up to two default signatures: one for when you compose new messages, and one for when you reply. Due to industry regulations, you will want to have a signature that includes your licensing information and contact information, and you’ll want to make that signature appear as your default for both composing new messages and for replies.
But the first step is to create a signature if you don’t already have one. To create a signature click Create new. You can rename the signature by clicking the pencil icon next to the label. Next, make sure your signature is selected, and then compose the signature at the right.
Some recommendations follow:
Do: include your contact information, your license information, and “CENTURY 21 Redwood Realty”
Don’t: Use special fonts or colors, try to keep the signature compact—remember, your signature will appear in new emails and replies, and big bulky signatures make email threads very difficult to read
If you want to include the CENTURY 21 Redwood Realty logo in your signature, please place it at the bottom, flush left, and follow these steps to get the image:
First, put your cursor in the signature editor in the position in which you wish to insert the image (preferably on its own line at the bottom of the signature). Then, click the Image icon on the editor toolbar:

In the modal that appears, click Web address (URL), and then in the URL field, paste in this URL:
https://c21redwood-static.s3.us-east-1.amazonaws.com/images/logo/c21-redwood-email-logo.png
The window will now look like this:
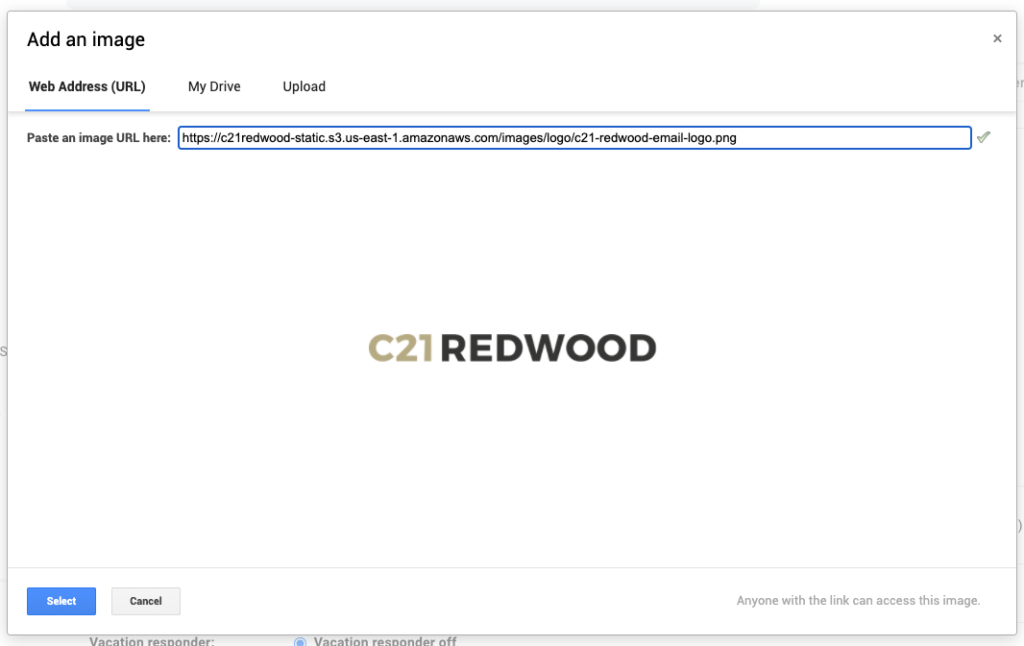
Click the Select button to return to the Settings screen.
If you want to add other photos to your signature, you can. Just click the Image icon on the signature editor again, and upload an image or choose one from your Google Drive.
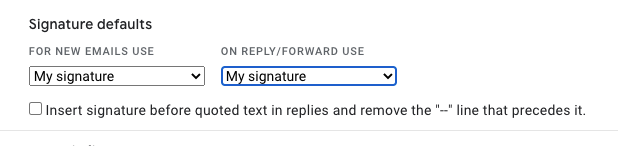
Next, under the label Signature defaults, choose your signature from both boxes—this will make your signature appear on new messages and replies.
Lastly, scroll to the bottom of the screen and click Save changes.
To see your new signature, go back to your Inbox and compose a new message.