.png)
Creating a door hanger in Redwood Marketing Studio 2.0
This guide is designed to walk through creating a door hanger in Redwood Marketing Studio 2.0:
- Our Marketing Studio 2.0 can be found with all of your other apps in accessRedwood.

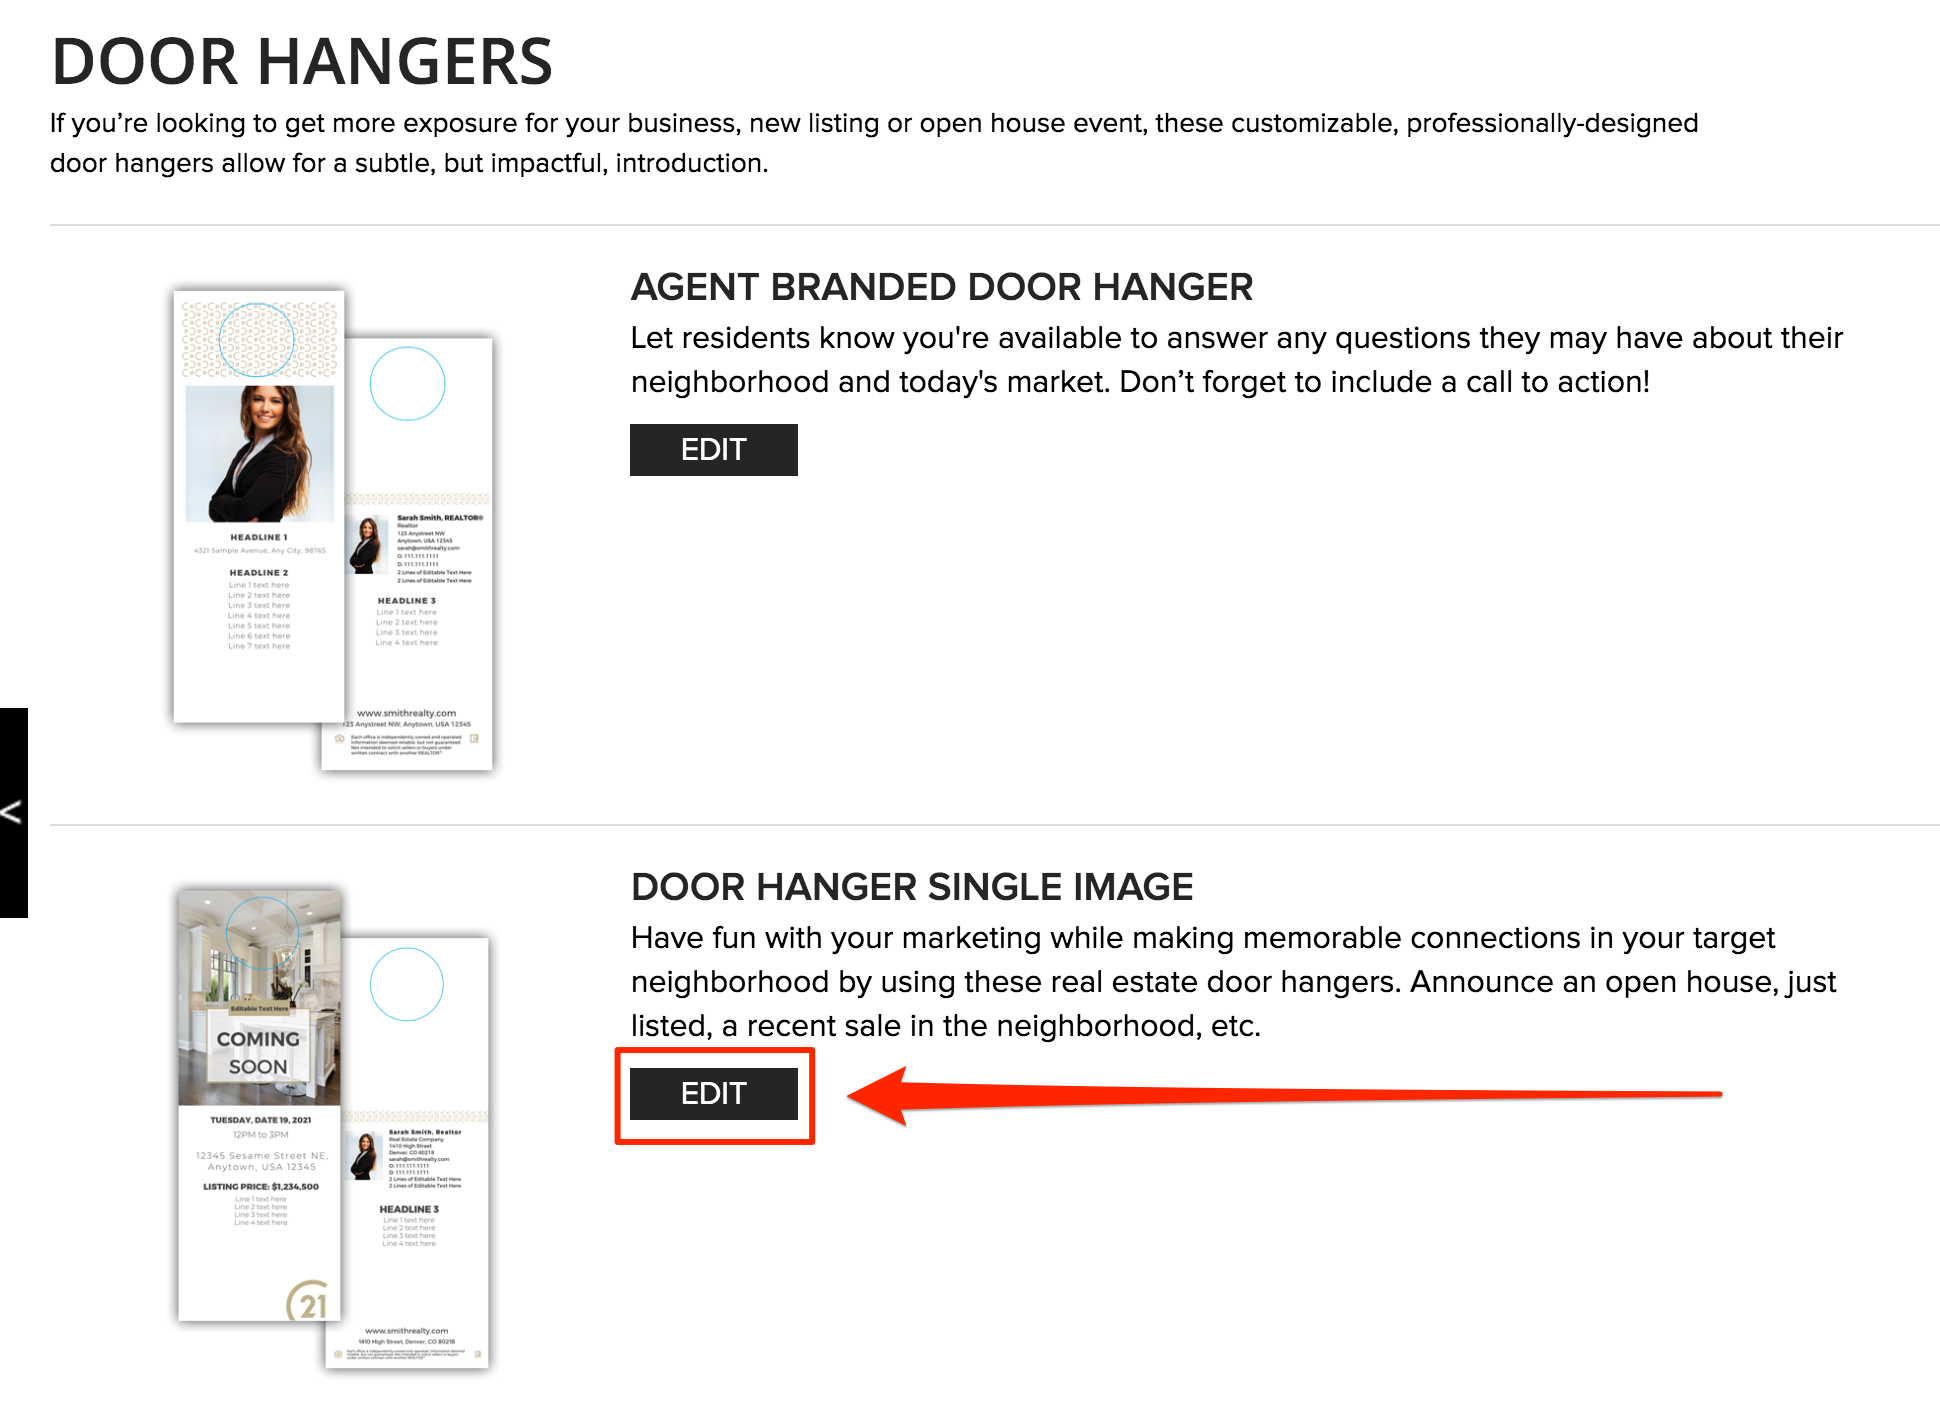
- Click on Browse Designs for Door Hangers:

- Select the template by clicking EDIT. The Agent Branded is ideal for personal marketing, and the Single Image design offers each listing status to market a property:
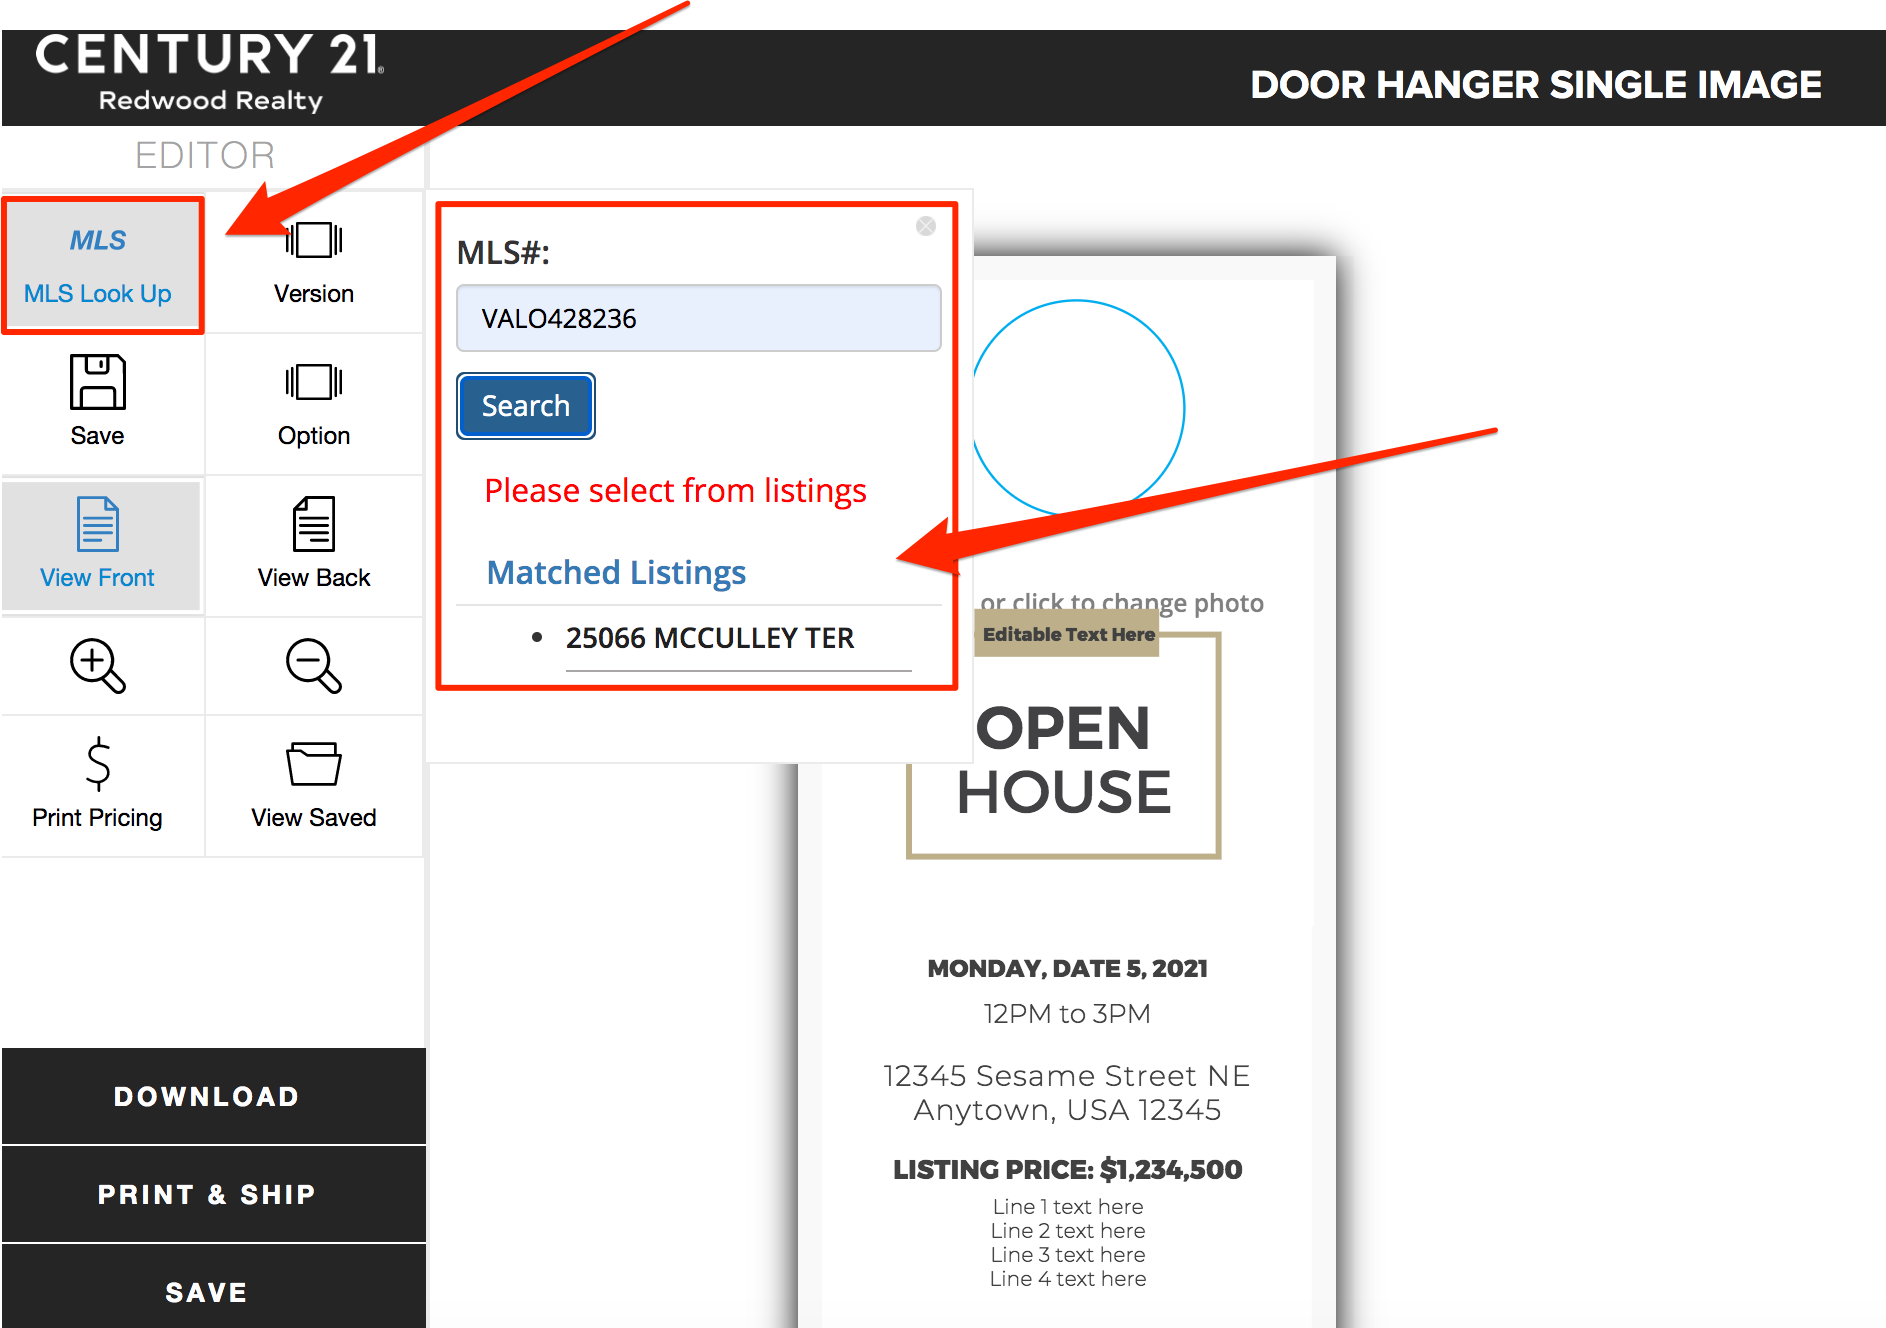
- You can drag an image into the photo spaces, or click to browse images on your computer, OR Click on MLS Look Up, paste the MLS # of the property you would like to promote, click Search and click on the address when it appears:
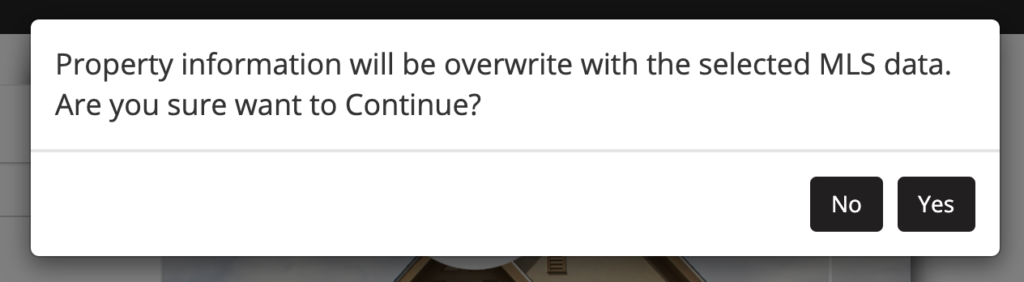
- Click Yes:
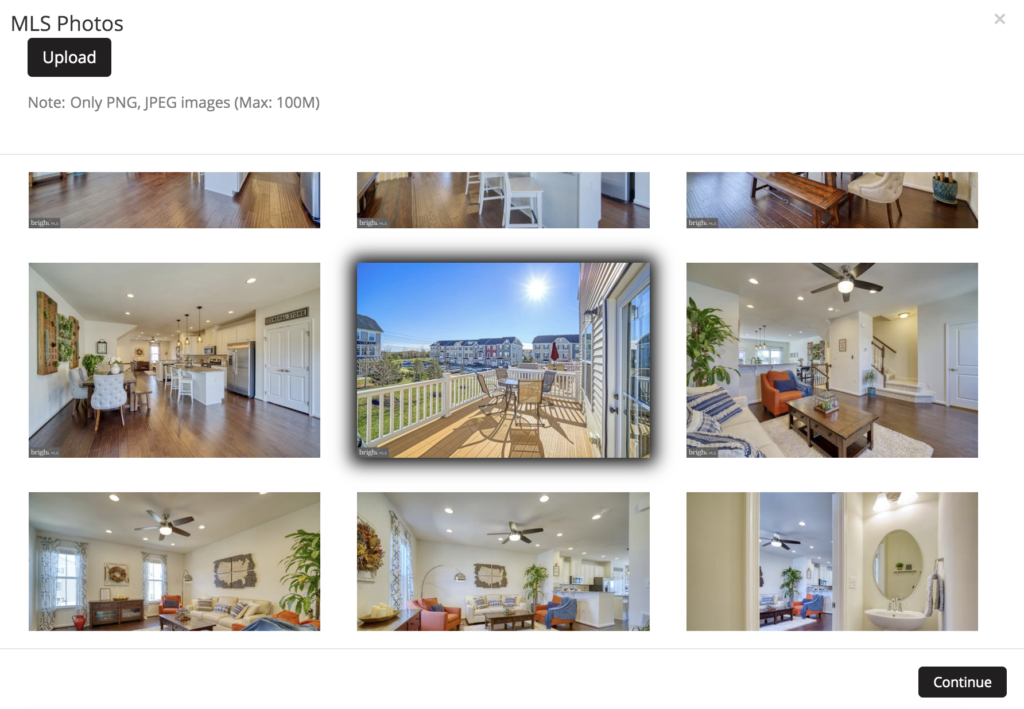
- Photos and the will populate into the template. Click the photo to select an alternative image.

- Select an alternative photo and click Continue:
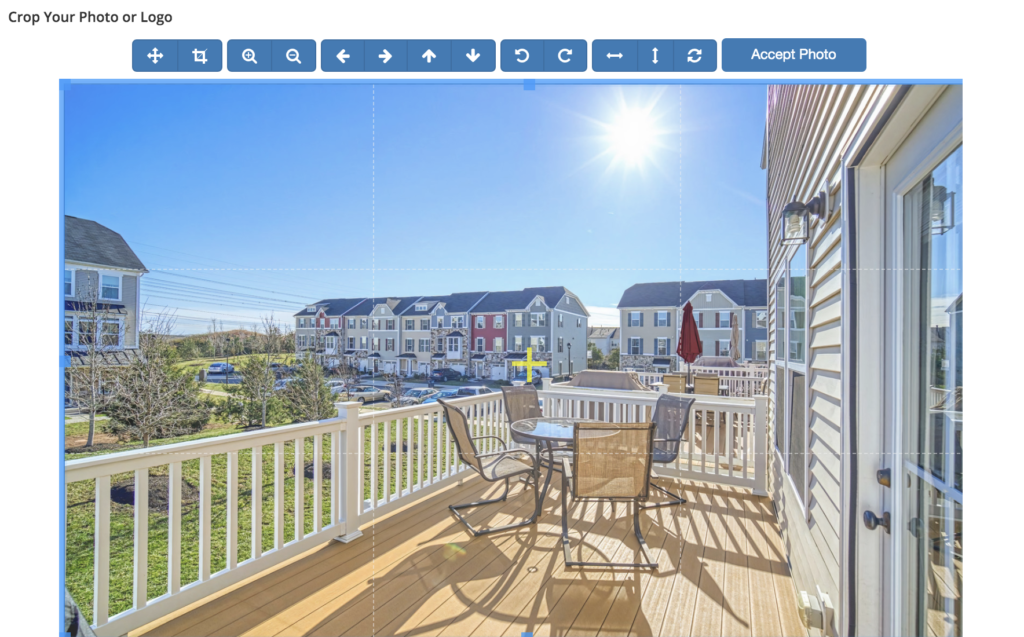
- Adjust photo as needed and click Accept Photo, and then Use this image:
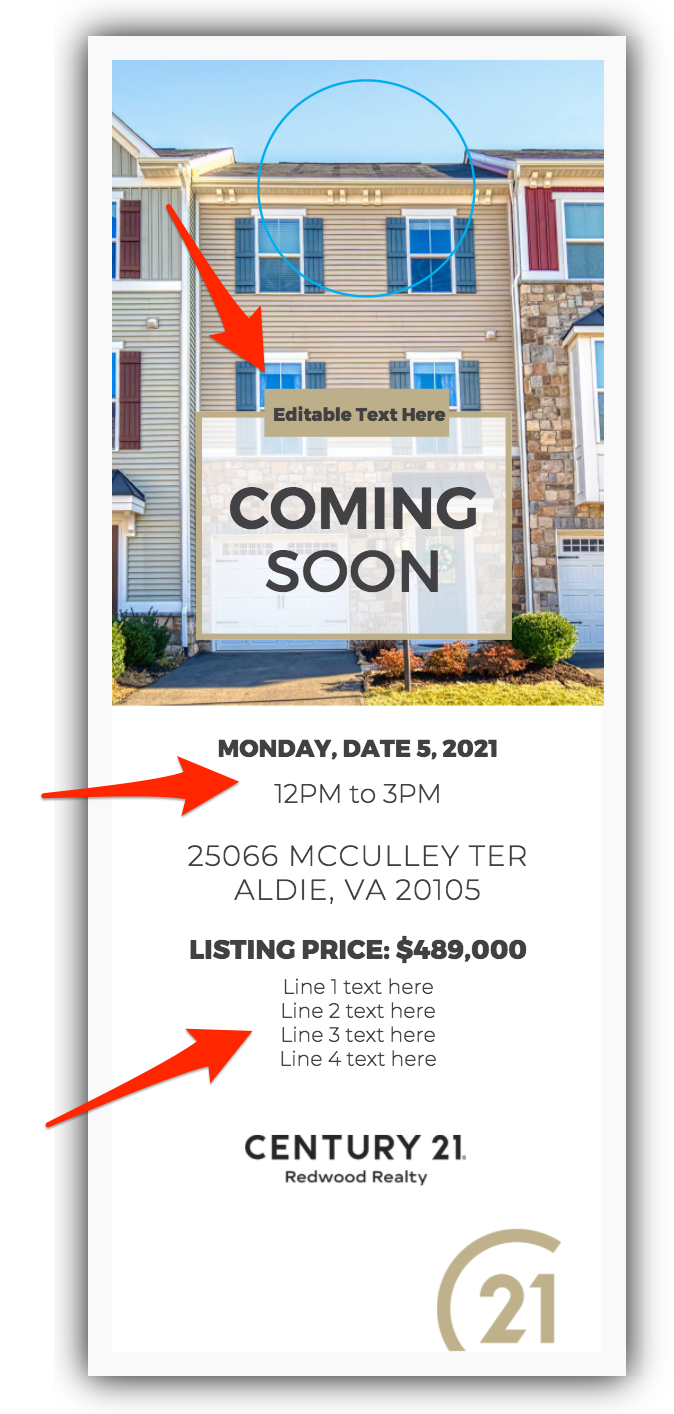
- Click Option to select a status, or click the text to type headline of choice:

- Click on the date, time, and all other text fields to edit or delete as desired:
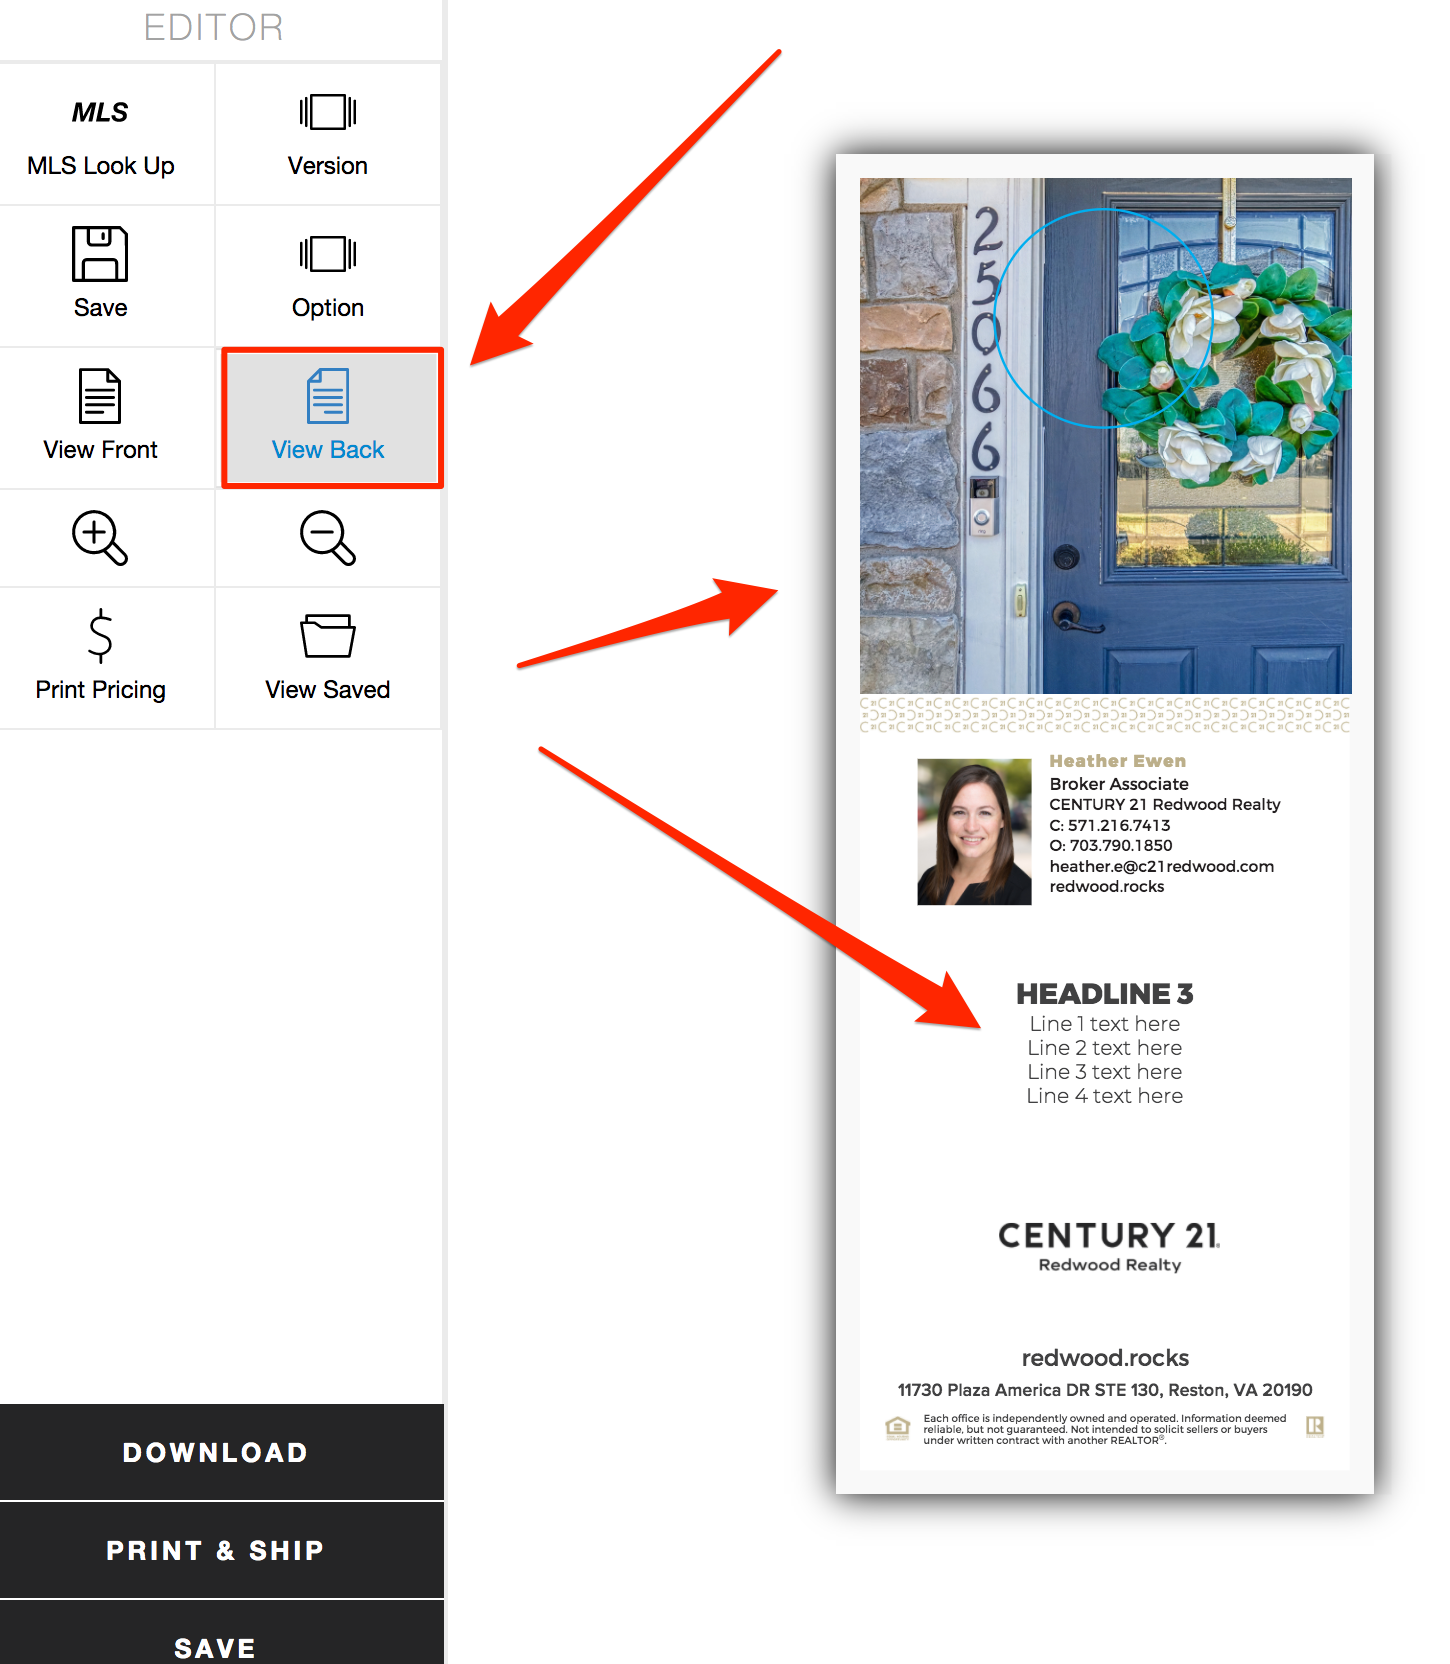
- Click View Back and edit photo and text as needed.
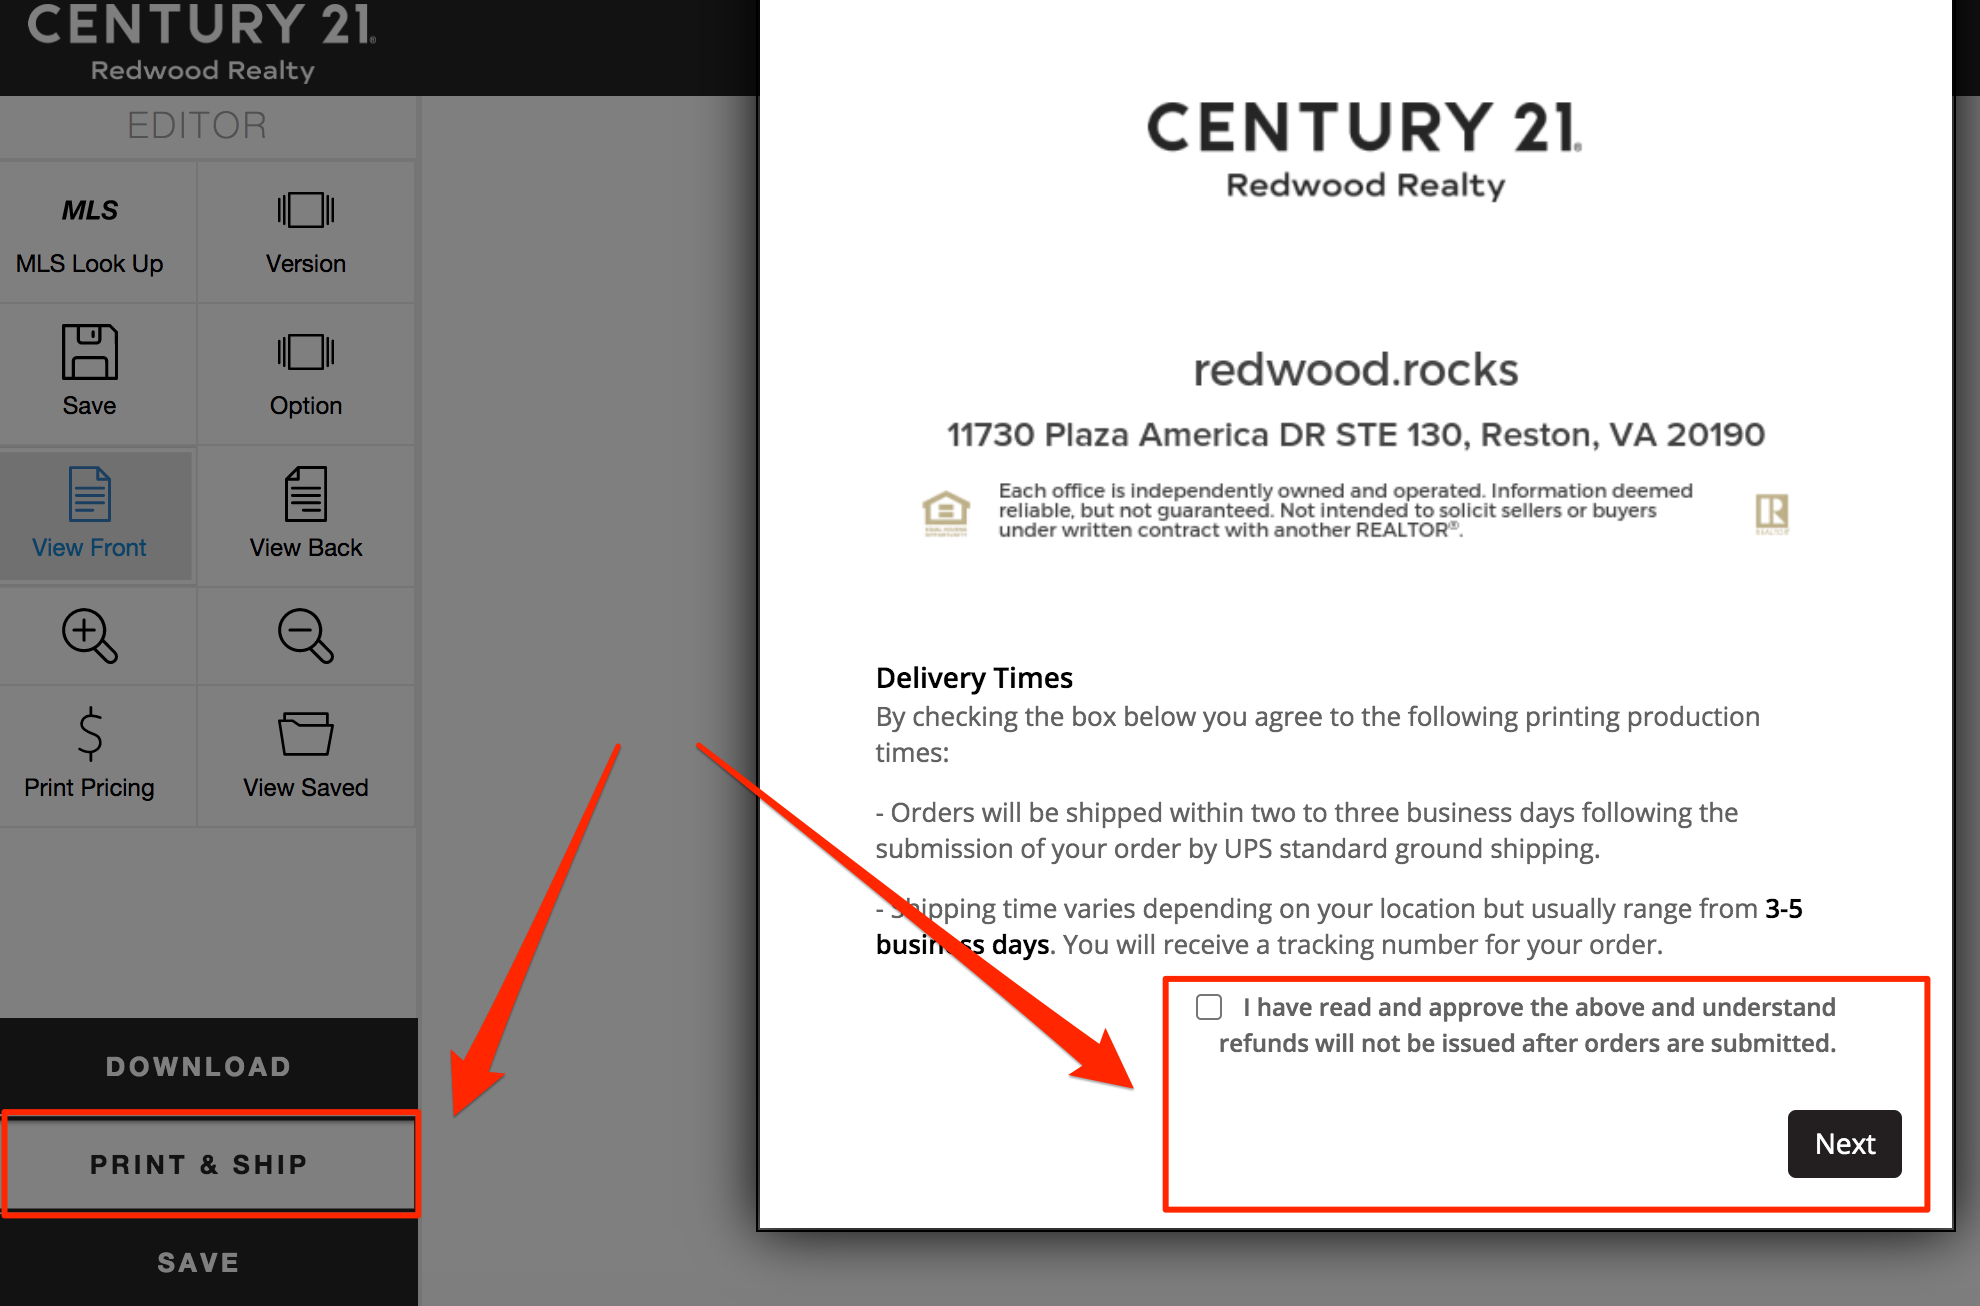
- When you are finished designing your door hanger, Click Print & Ship, review your project, accept the terms and click Next.
- Confirm your shipping address, select your quantity, enter a project name, select UV/Matte, and click Checkout to continue.
Questions? Please contact 1-866-936-1009 or marketingstudiohelp@c21redwood.com.