.png)
How Do I Share a Graphic that was Posted on my Office's Social Media Page?
Redwood provides its agents with graphics throughout the year to recognize holidays, events, and recognition. These are usually distributed via your office’s private Facebook Group. We want you to share these with YOUR SOI to increase your social media engagement! Here’s how!
To share a graphic posted to your office’s social media account, you will first need to save it to your Mac, PC, or phone.
Saving an Image on Your Mobile Device
Watch this short video for step-by-step instructions on how to save an image shared to your office Facebook page on your mobile device.
Saving an Image on a Mac:
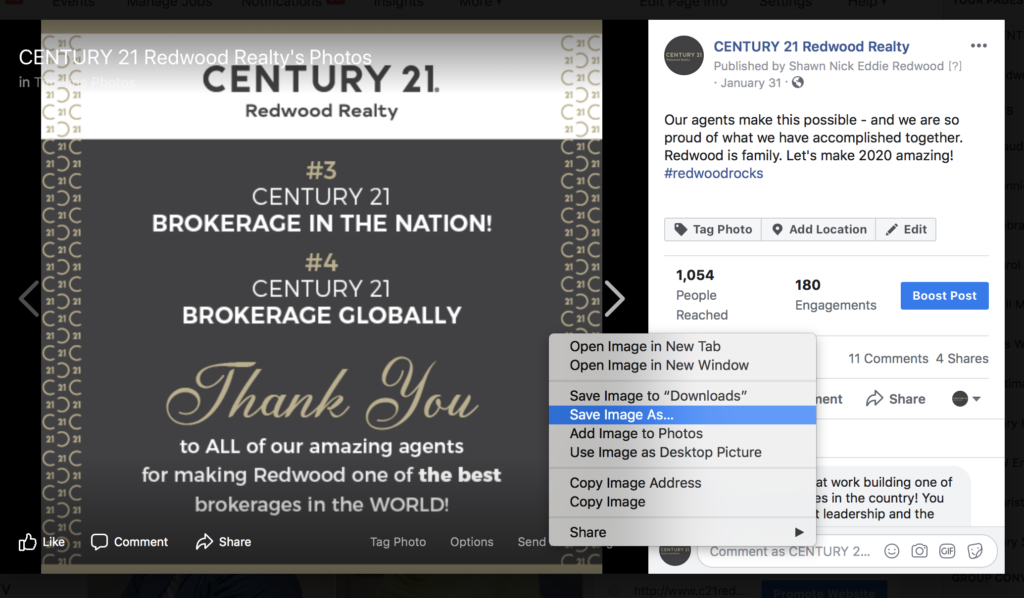
First, open the post containing the graphic you want to save.
Next, right-click or hold control while clicking the image, scroll on the pop-up window to “save image as.” Save the image with an identifiable name, on your computer in a location where it is easily accessible.
Saving an Image on a PC:
First, open the post containing the graphic you want to save.
Next, right-click on the image you want to save, scroll to the pop-up window, and select “save image as.” Save the image with an identifiable name on your computer in an easily accessible location.

Sharing your Graphic on Facebook
Once you have saved your photo, log in to Facebook to create your post.
At the top of your home page, click the field to “Create Post,” where it says “What’s on Your Mind?”
Here, you are able to add text and write something about the graphic you are sharing.
When you are satisfied with the text, you can add your graphic!
To select your graphic and add it to your post, click on the button directly below your text for photo/video.

Locate the graphic you saved and select it. Once it appears on your post below your text, click “Post” to share it with your social sphere!
Sharing your Graphic on Instagram
Sharing photos on Instagram must be done from your mobile device.
First, Open the Instagram app on your mobile device.
To create a new post, click the plus sign in the middle of the menu at the bottom of the screen.
Select Library to choose a photo from the camera roll on your screen. If you followed the directions above on saving an image on your mobile device, the image you saved should be first in your library.
Once you have located and selected the correct image, click Next in the top right corner.
On the next page, you can edit your photo or add filters. If you like the way your image looks, click Next again in the top right corner.
Next, you can add a caption for your photo. On this screen, you can also share this to other Instagram accounts or share it to your other social media accounts directly (Facebook, Twitter, etc.)
If satisfied with your caption photo and other settings, click Share in the top right to post your image!