.png)
Creating a Listing Postcard in Redwood Marketing Studio 2.0
This guide is designed to walk through creating a postcard in Redwood Marketing Studio 2.0.
Prospect new listings and show your neighbors you’re their local go-to expert. Draw attention from the community with these postcards that allow you to customize short, simple copy.
Step 1: Accessing the Postcards in Marketing Studio 2.0
- Our Marketing Studio 2.0 can be found with all of your other apps in accessRedwood.

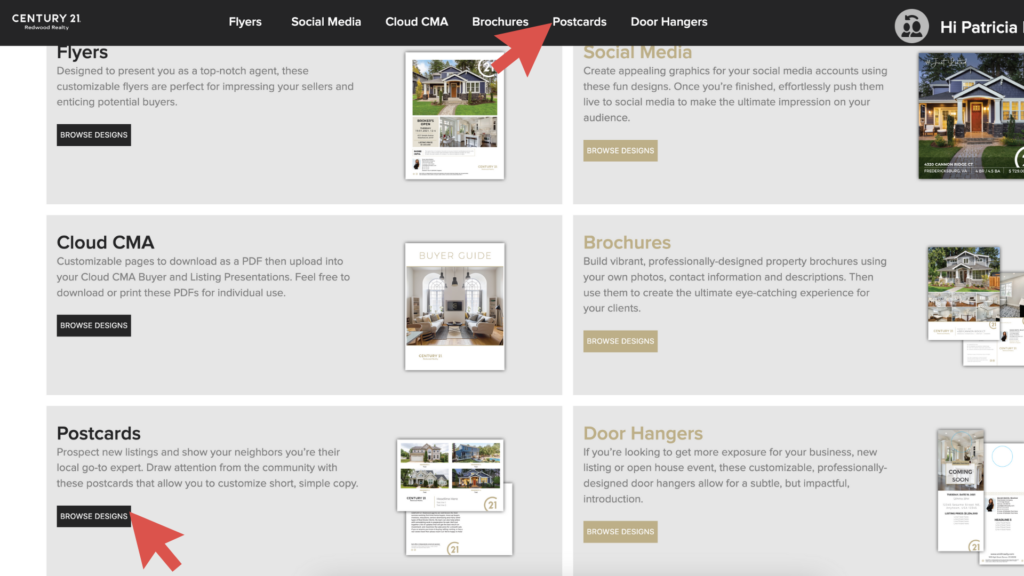
2. Click on “Postcards” on the top menu OR click “Browse Designs” under the postcard section:
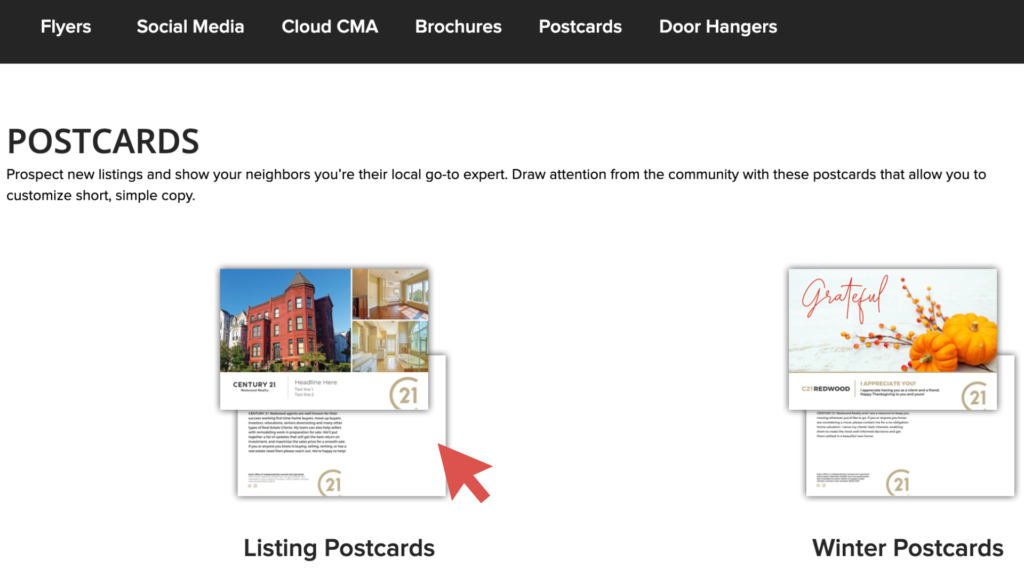
3. Click “Listing Postcards”:
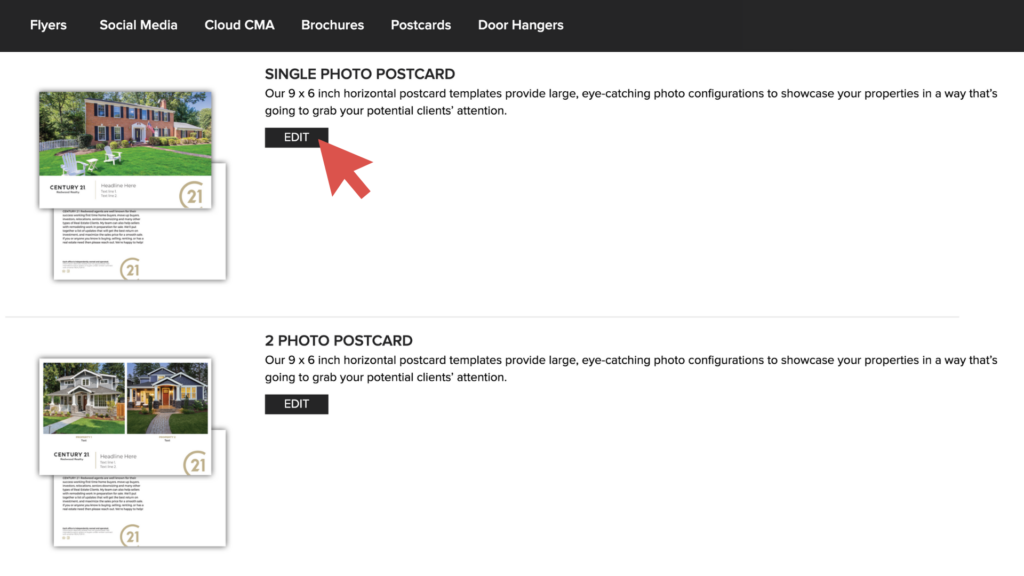
4. Select the template you would like to use by clicking “EDIT”.
Step 2: Editing the Postcard
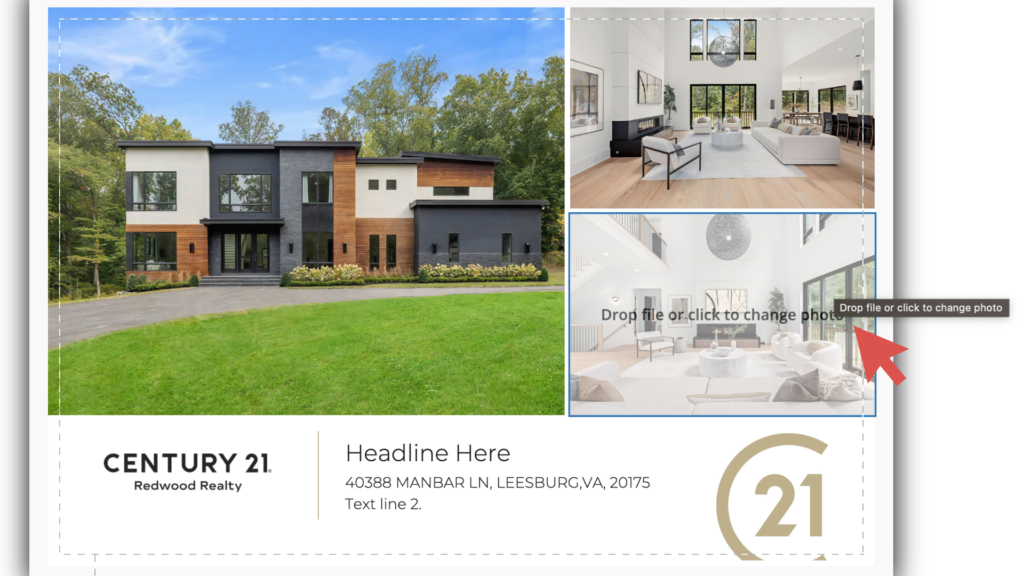
5. There are three options available for you to add the listing images to the postcard:
a. Drag and Drop: Click and drag an image from your file folder into the photo spaces.
b. Browse Your Computer: Click the photo box on the postcard template to browse, select, and upload images from your computer.
c. MLS Look Up: Click on “MLS Look Up” box, at the top left hand corner. Paste the MLS # of the property you would like to promote, click “Search,” and click on the address when it appears.
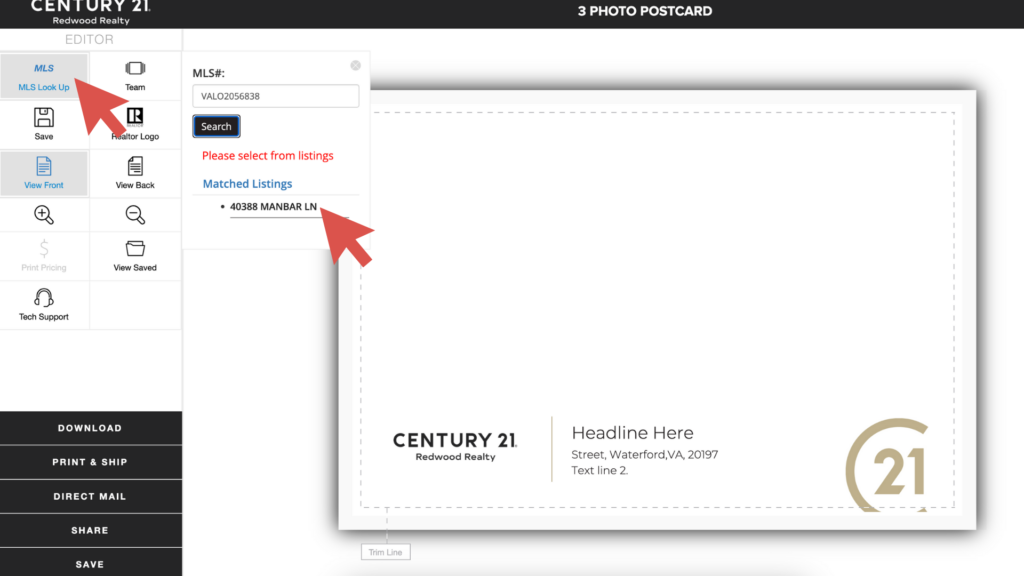
6. A pop up window will appear stating, “Do you wish to replace the content with the MLS data? If so, click yes to continue.” Click “Yes”:
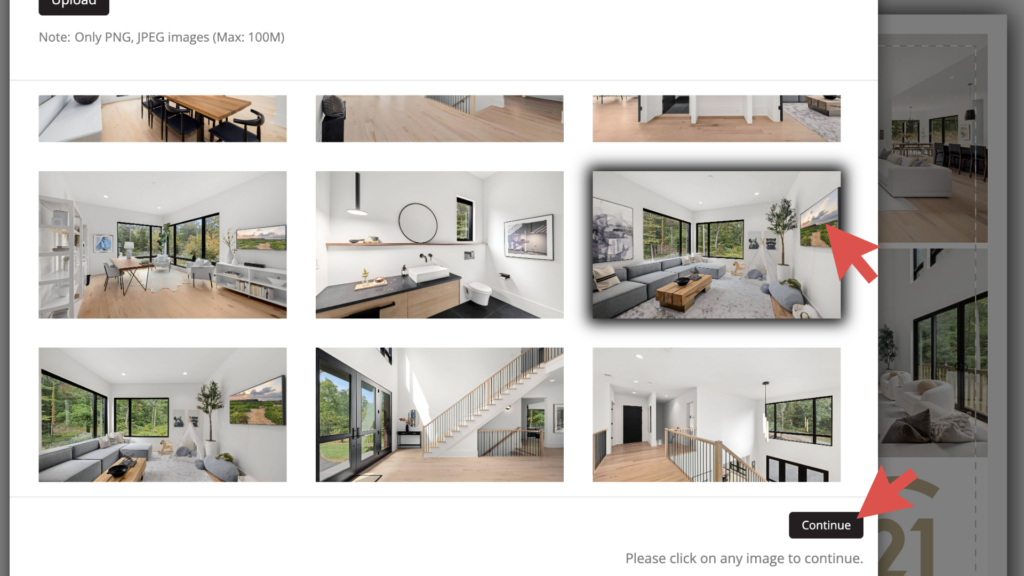
7. Photos and property data will populate into the template. To select an alternative image, click the photo box.
8. Select the alternative photo and click “Continue”:
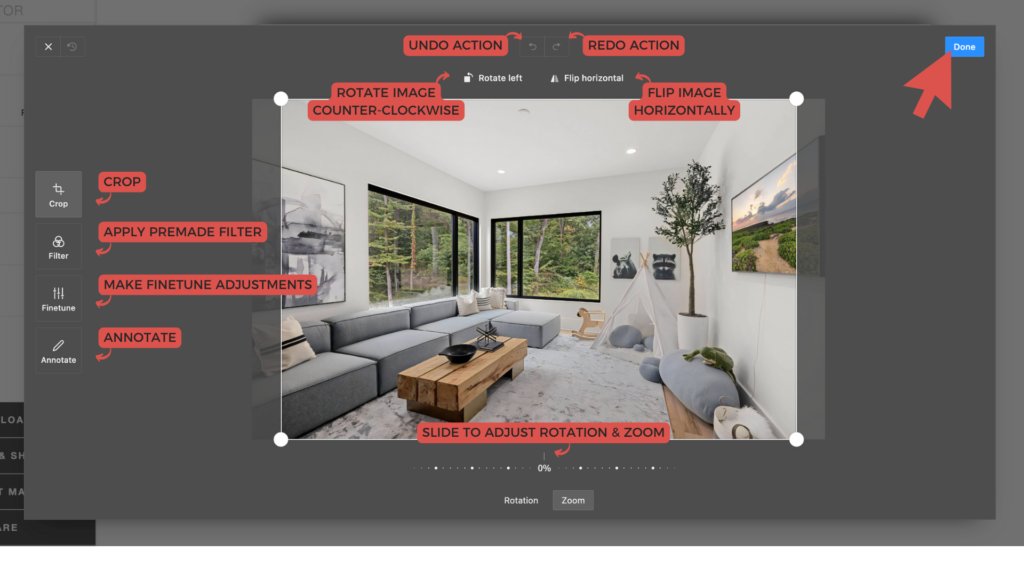
9. If necessary, make adjustments to the photo and click “Done”:
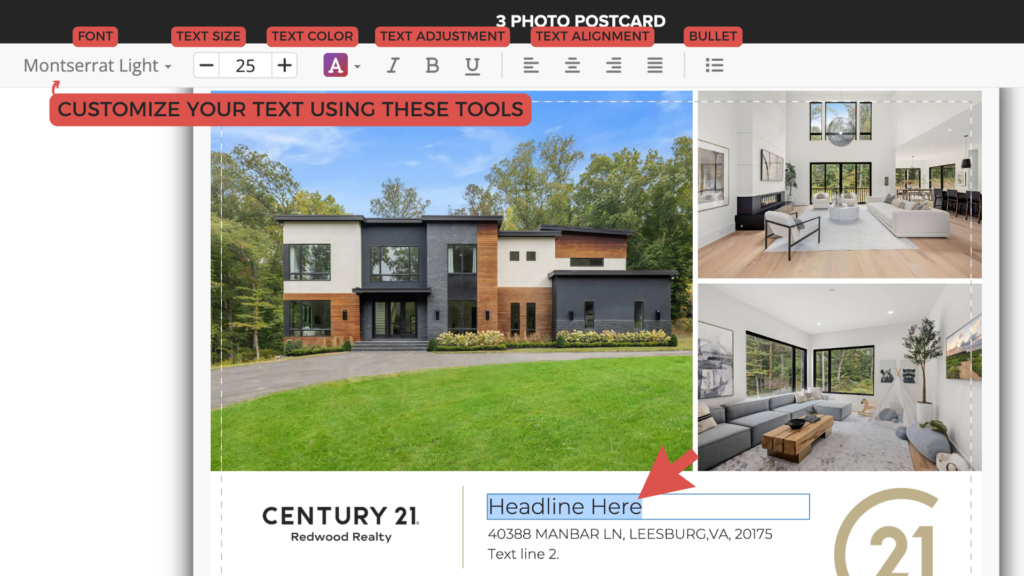
10. Update the additional text by selecting and highlighting the text:
a. Use the tools along the top in the toolbar to customize your text.
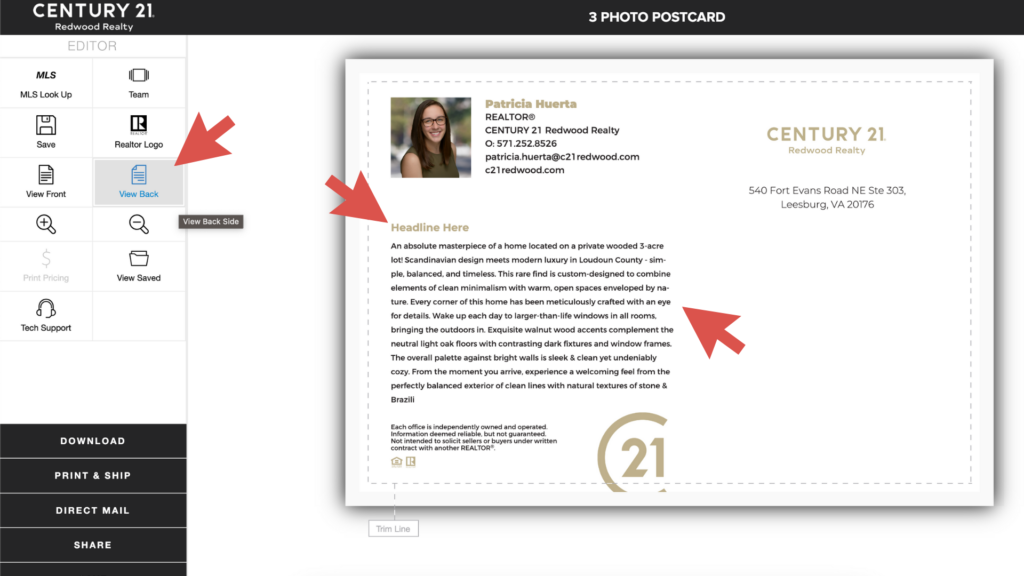
11. Once you have updated the front of the postcard, click “View Back” and edit text as needed:
a. If you use the “MLS Look Up” feature, please make sure you thoroughly review the description text on the back of the postcard as the platform can only import a certain number of characters from the MLS description, which may result in the text being cut off mid-sentence.
12. When you are finished designing your postcard, you have the option to select Print & Ship or Direct Mail.
a. Print & Ship: Postcards will be printed and mailed to ONE address (generally your Redwood Office or your personal address). You then are responsible for writing out the receipts mailing address, as well as, paying for postage for each postcard.
b. Direct Mail: Postcards, with the provided recipient mailing addresses, will be printed and mailed directly to the intended recipient. Postage will be calculated and included in your total pricing upon checkout.
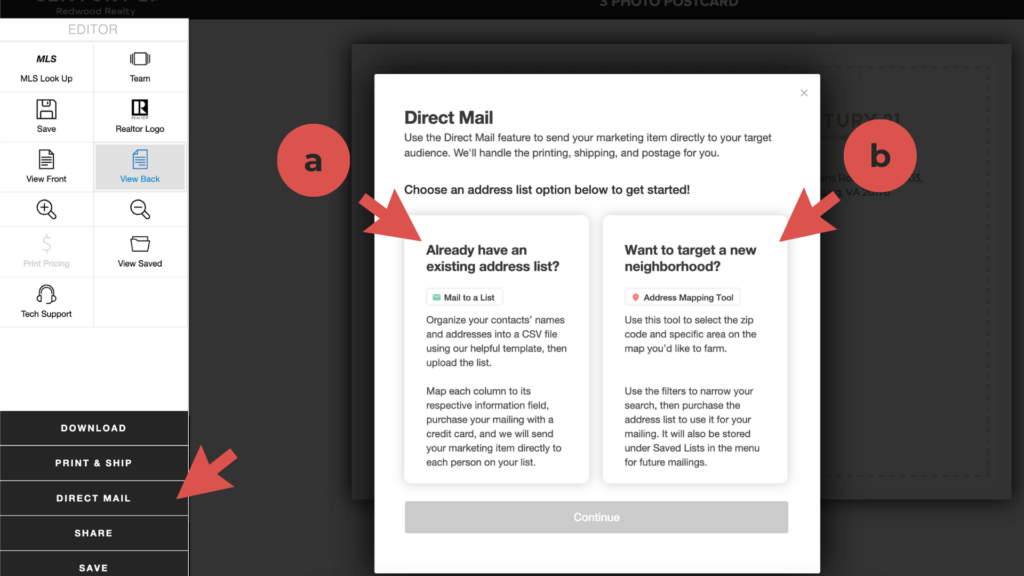
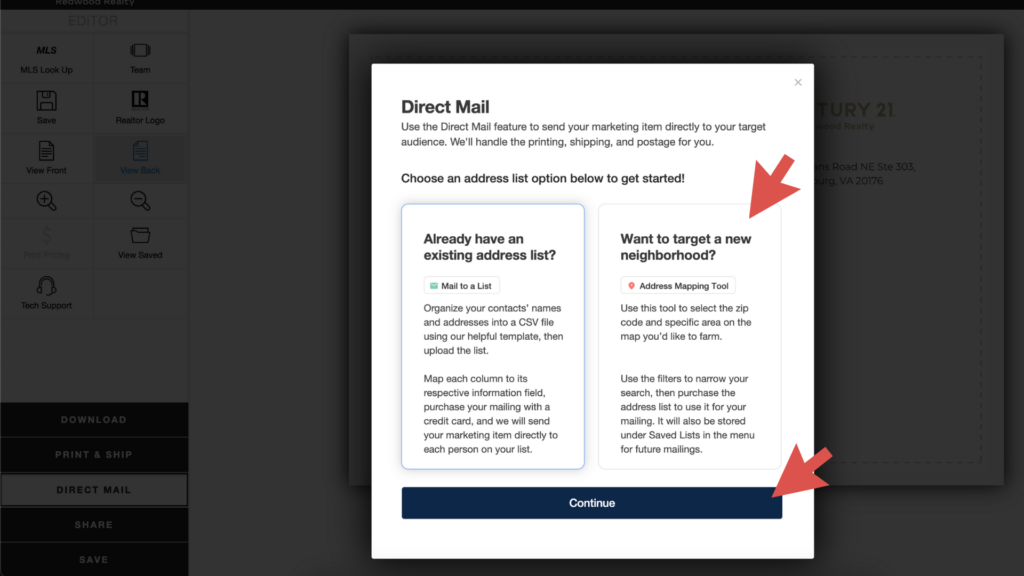
13. To ship directly to your receipts select “Direct Mail”:
a. Mail to a List: Organize your contact’s names and addresses into a CSV file, then upload the list.
b. Address Mapping Tool: Use this tool to select the zip code and specific areas on the map you’d like to farm.
Step 3: Purchasing Postcards: Direct Mail - Mail to a List
14. If you have an existing address list, select “Mail to a List” and then click “Continue”.
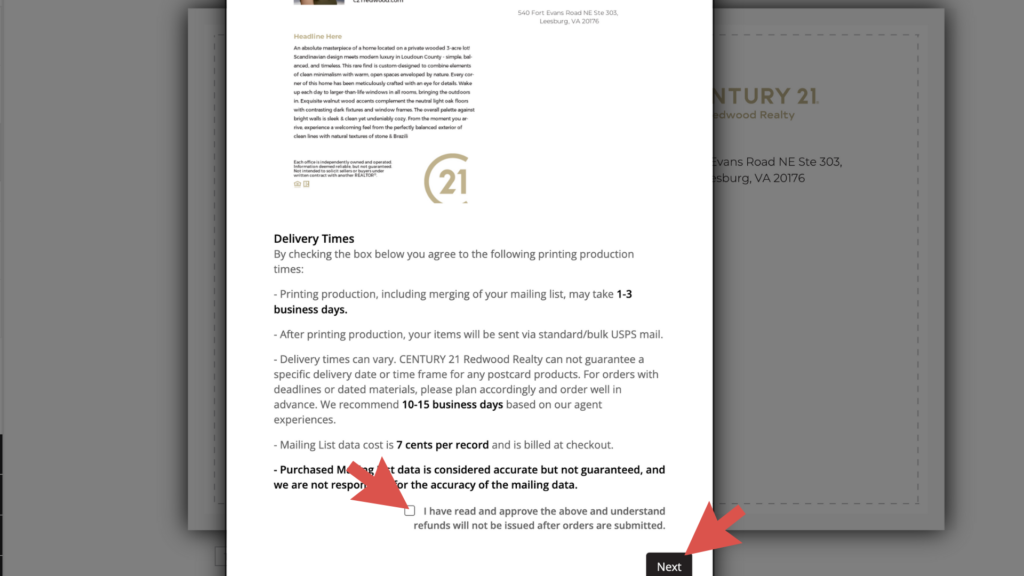
15. IMPORTANT: A pop up will appear that requires you to review your design, as well as, read and agree to the production and delivery guidelines that are outlined. Please review your design and this information carefully.
Once you have finished your review and read through the guidelines, tick the box next to “I have read and approve the above and understand refunds will not be issued after orders are submitted.”
Click “Next”
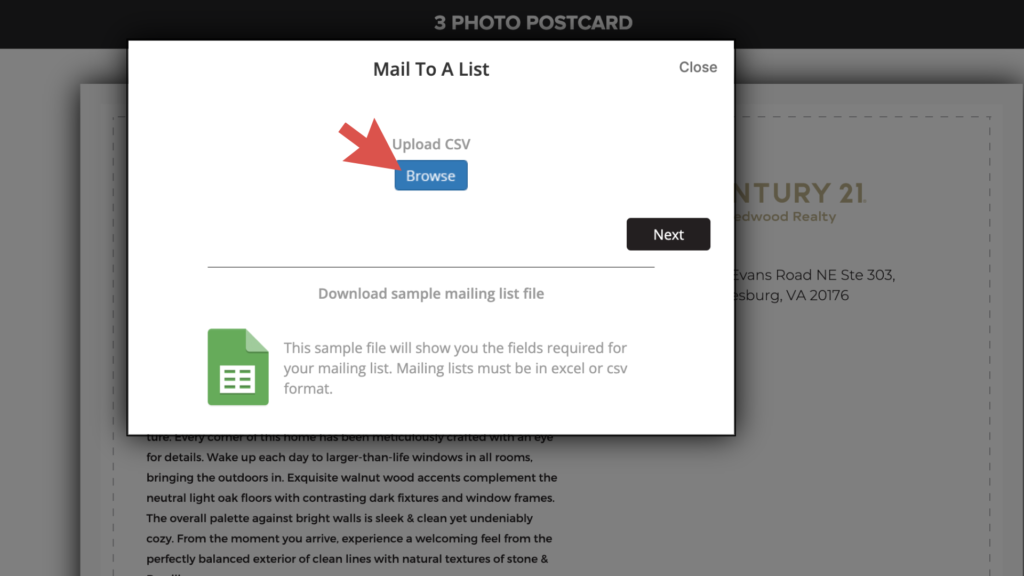
16. To upload your CSV file mailing list, click “Browse”. Select your mailing list from your computer and then click “Next”. ** The list must contain separate columns for Name, Address, City, State, and Zip.
17. Use the drop down arrows to select and match the fields, then click “Next”:
18. You will be asked if you want to Save your mailing list to your account to select quicker next time. If you would like to save the list, click “Save”. If you do not want to save the list, click “Skip”.
Step 4: Purchasing Postcards: Direct Mail - Purchasing a List
14. If you do not have an existing mailing list and would like to target a specific area to purchase a list, select “Area Mapping Tool” and then click “Continue”.
15. IMPORTANT: A pop up will appear that requires you to review your design, as well as, read and agree to the production and delivery guidelines that are outlined. Please review your design and this information carefully.
Once you have finished your review and read through the guidelines, tick the box next to “I have read and approve the above and understand refunds will not be issued after orders are submitted.”
Click “Next”
16. To create a purchase mailing list you must complete the following:
a. Enter Zip Code or Address
b. Select Radius or Points from the dropdown menu:
i. Radius: Circle created around the main point (most common).
ii. Point: Adjustable square, created around the main point. This square can be manipulated to cover very specific areas.
c. Select Confirmed Homeowner and/or Probable Renter:
i. Confirmed Homeowner: List of people who own and reside on the property
ii. Probable Renter: Resident occupant of dwelling designated as rental property
d. Click “Count” to populate the number of addresses that meet the criteria you selected.
e. Click “Accept User Agreement” and click “attach”.
f. To finalize the list click “Next”.

Important Note: Addresses purchased using this method cost .07 cents per address. The total for these addresses will be added to checkout.
Step 5: Finalizing Your Order
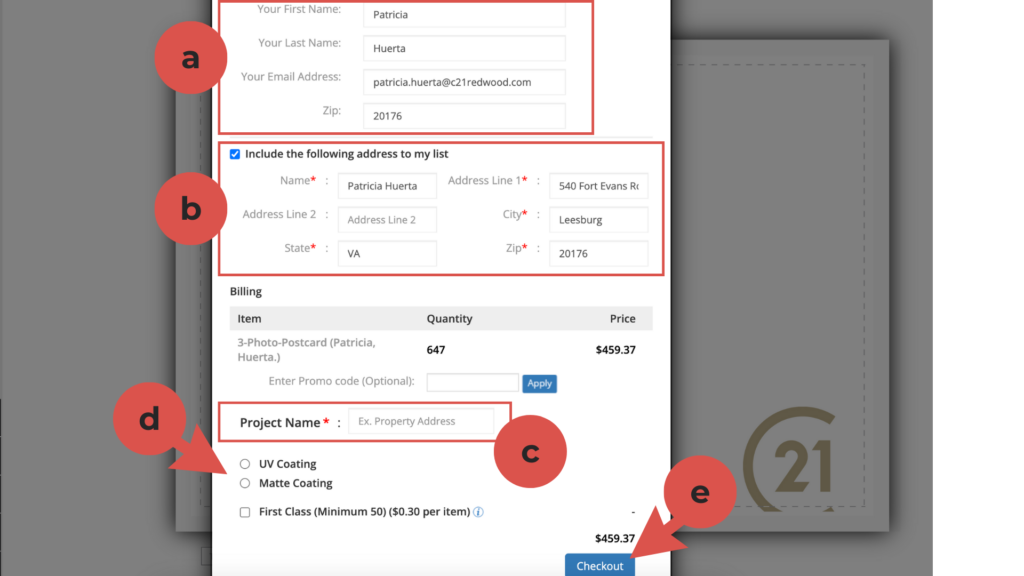
- Lastly, on the final checkout page, you will need to complete the following steps:
a. Contact Information: Fill out your first name, last name, email address, and zip code.
b. Include the following address to my list: If you would like to include an additional address (i.e. your personal address or office address) in your list please complete the section that includes your name, address line 1 (and 2), city, state, and zip. If you do not want to include an additional address on the list, untick the box.
c. Project Name: Give the postcard project a name. This will allow you to easily identify each postcard you create.
d. Choose Coating: UV Coating has more of a glossy finish and matte has more of a flat finish.
e. Checkout: Once you have finished and reviewed the required sections, click “Checkout”.
Important Postage Information:
- If your mailing list count is under 200, First Class postage will be pre-selected.
- If your count is over 200 you have the option for standard mail or click the option for first class.
*First class is recommended for cards advertising an Open House or another timely event.
Important Shipping Information:
- Printing production, including merging of your mailing list, may take 1-3 business days.
- After printing production, your items will be sent via standard/bulk USPS mail.
- Delivery times can vary. CENTURY 21 Redwood Realty can not guarantee a specific delivery date or time frame for any postcard products. For orders with deadlines or dated materials, please plan accordingly and order well in advance. We recommend 10-15 business days based on our agent experiences.
- Mailing List data cost is 7 cents per record and is billed at checkout.
Purchased Mailing List data is considered accurate but not guaranteed, and we are not responsible for the accuracy of the mailing data.